Getting Started with ASP.NET Core Web API
Introduction
A client requested an explanation of the Web API project I am currently developing. Initially, I only intended to explain the project itself, but the client also expressed interest in learning how to easily create and develop an ASP.NET Core Web API. While brainstorming the presentation, I couldn't find a suitable way to present it, so I decided to write a set of notes focusing on general, project-independent fundamental knowledge.
This article covers only the basic or commonly used parts. For complete details, please refer to the MSDN documentation on creating Web APIs with ASP.NET Core.
Creating a Project
I usually don't create a project directly; instead, I start by creating a "Blank Solution." If you cannot find the "Blank Solution" option in Visual Studio, check the Visual Studio Installer to see if project templates are selected, such as "Other Project Templates (Legacy)" or ".NET Framework projects and project templates." I recall it being the former, but I am not entirely certain.
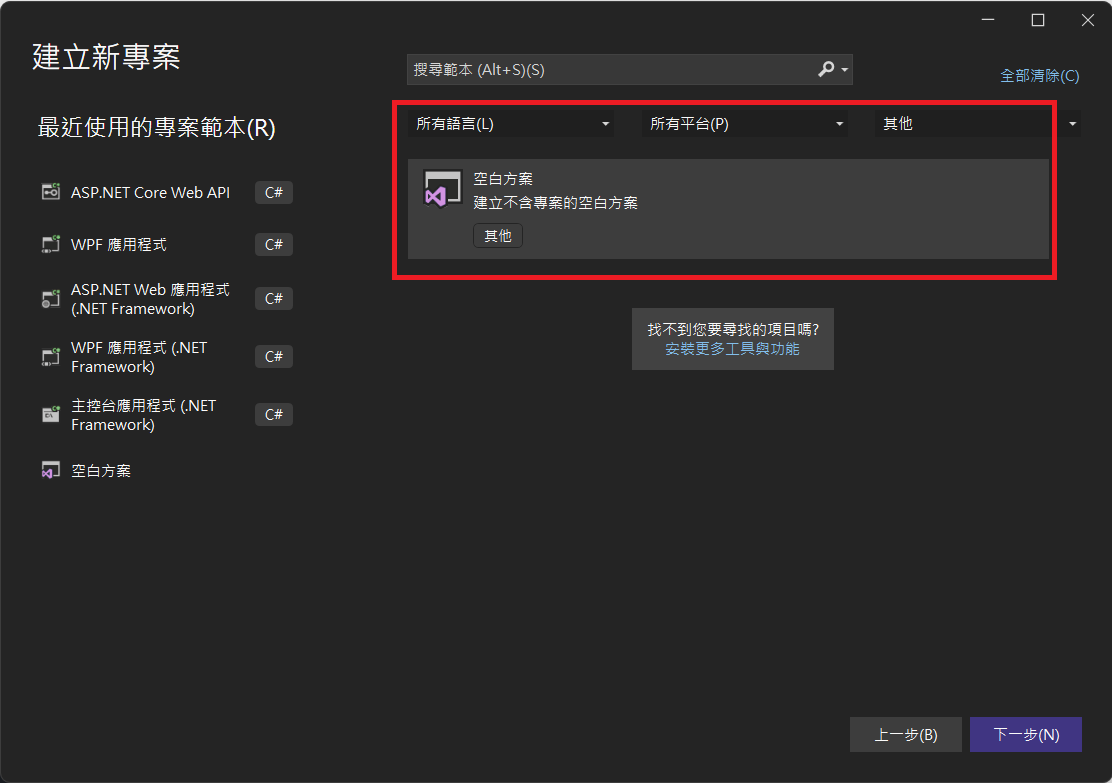
When creating a Web API project, select "ASP.NET Core Web API."

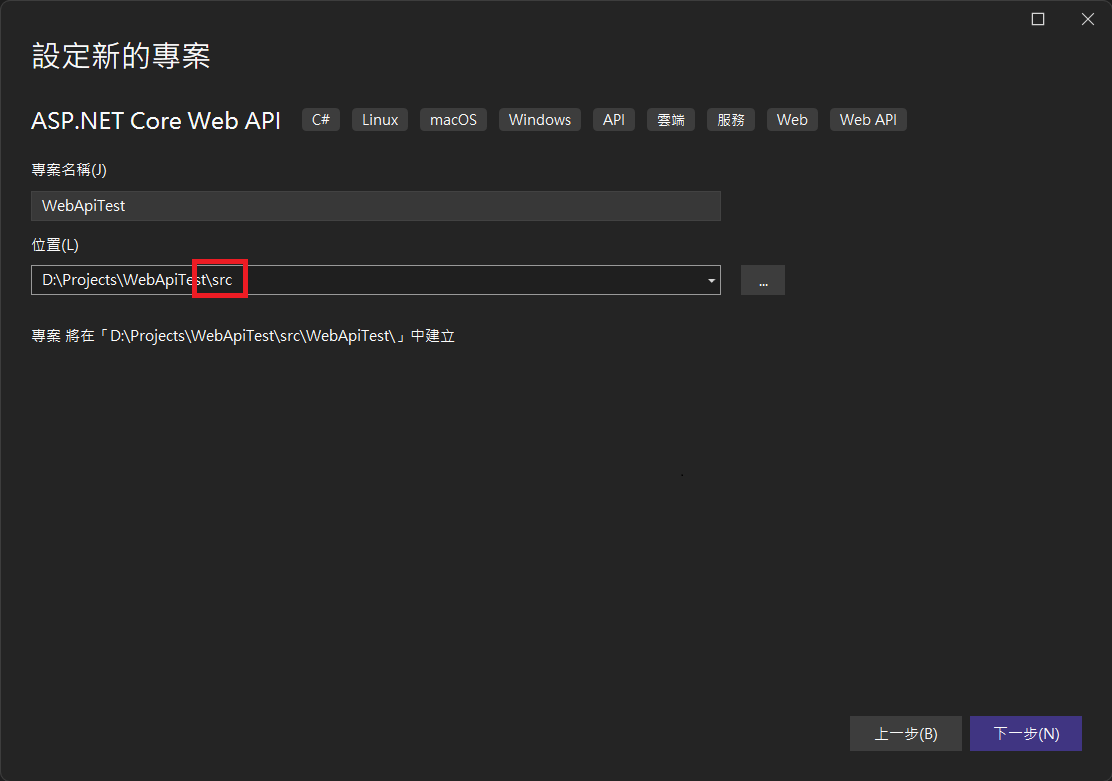
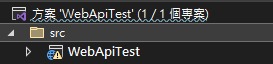
By convention, I place the project path under a "src" folder.
Here is an explanation of the settings under "Additional information" in the image below:

Enable OpenAPI support: Checking this will install "Swashbuckle.AspNetCore" by default and add Swagger-related code to "Program.cs."
Do not use top-level statements: Top-level statements are a feature introduced in C# 9.0. Simply put, programs usually use a
Mainmethod as an entry point, but with top-level statements, the code in the "Program.cs" file no longer requires aProgramclass or aMainmethod. This design aims to simplify the code structure. For more details, refer to Top-level statements - programs without Main methods.Use controllers: If unchecked, the project will be created using the Minimal API approach. For details, refer to Minimal APIs overview.
Create a solution folder to organize projects:
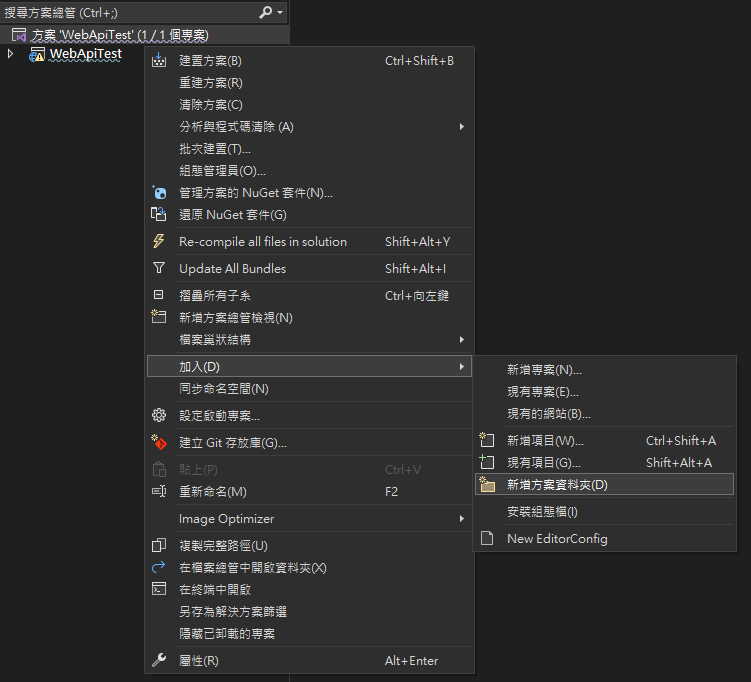
Move the project under the "src" solution folder:
Code Explanation
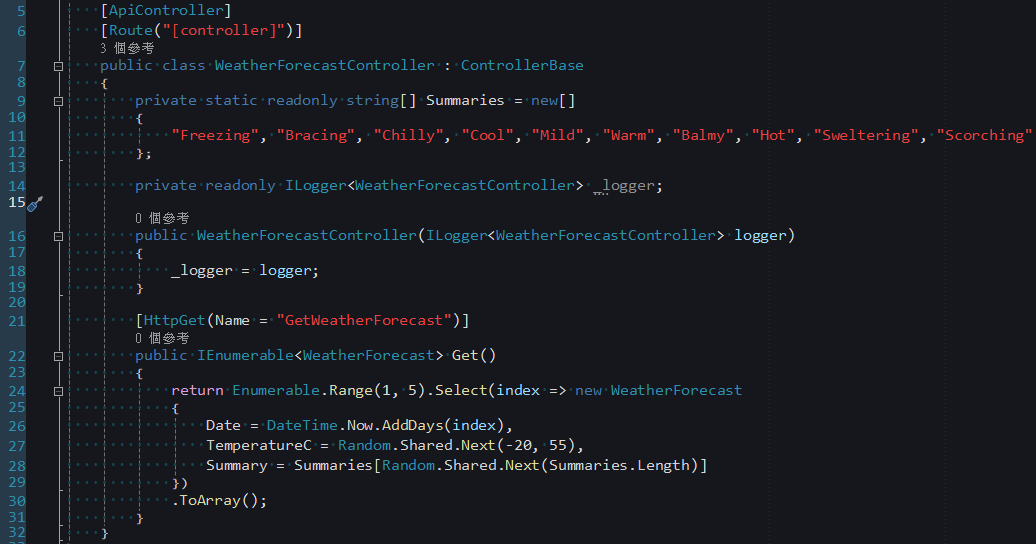
When creating a Web API project, the following sample code is generated by default. I will explain this part next.
ControllerBase
Unlike ASP.NET Framework, MVC and Web API controllers in ASP.NET Core do not originate from different assemblies; they both derive from the same base assembly. In ASP.NET Core, MVC controllers inherit from Controller by default, while Web API controllers inherit from the higher-level ControllerBase. Controller provides additional APIs related to Views, as well as three filter-related events: OnActionExecuting, OnActionExecuted, and OnActionExecutionAsync.
If a Web API controller needs to support both Views and Web API, or if you need to handle events like OnActionExecuting within the controller, you can inherit from Controller to meet those requirements.
ApiController
You can see that the ApiController attribute is set on the Web API controller. According to MSDN, it performs the following behaviors:
- Attribute routing requirement.
- Automatic HTTP 400 responses.
- Binding source parameter inference.
- Multipart/form-data request inference.
- Problem details for error status codes.
If you do not want to add the ApiController attribute to every controller, you can achieve this by defining a BasicController parent class. This BasicController can inherit from Controller or ControllerBase, and then all individual Web API controllers can inherit from BasicController.
// Define the BasicController parent class
[ApiController]
public class BasicController : ControllerBase {
    // Shared logic or properties can be added here
}

// Concrete Web API Controller inherits from BasicController
public class MyController : BasicController {
    // Implement Web API logic here
}Additionally, if you wish to disable some behaviors of ApiController, you can adjust them in Program.cs as follows:
builder.Services.AddControllers()
    .ConfigureApiBehaviorOptions(options => {
        // Disable automatic HTTP 400 responses
        options.SuppressModelStateInvalidFilter = true;

        // Disable multipart/form-data request inference
        options.SuppressConsumesConstraintForFormFileParameters = true;

        // Disable binding source parameter inference
        options.SuppressInferBindingSourcesForParameters = true;

        // Disable problem details for error status codes
        options.SuppressMapClientErrors = true;
});Attribute Routing Requirement
In ASP.NET Core Web API, once ApiController is set, you will use the Route attribute for conventional routing configuration. The Route attribute can be set on the parent controller, the current controller, or specific actions, with priority from high to low: Action > Controller > Parent Controller. Below are some common configuration examples:
RESTful Style
[Route("[controller]")]
public class MyController : BasicController {
    // GET: /My
    [HttpGet]
    public IActionResult Get() {
        // Implement logic to retrieve resources
        return Ok("GET method");
    }

    // GET: /My/1
    [HttpGet("{id}")]
    public IActionResult GetById(int id) {
        // Implement logic to retrieve a specific resource
        return Ok($"GET method with id {id}");
    }

    // POST: /My
    [HttpPost]
    public IActionResult Post([FromBody] MyModel model) {
        // Implement logic to add a resource
        return Ok("POST method");
    }

    // PUT: /My/1
    [HttpPut("{id}")]
    public IActionResult Put(int id, [FromBody] MyModel model) {
        // Implement logic to update a resource
        return Ok($"PUT method with id {id}");
    }

    // PATCH: /My/1
    [HttpPatch("{id}")]
    public IActionResult Patch(int id, [FromBody] MyPatchModel model) {
        // Implement logic to partially update a resource
        return Ok($"PATCH method with id {id}");
    }

    // DELETE: /My/1
    [HttpDelete("{id}")]
    public IActionResult Delete(int id) {
        // Implement logic to delete a resource
        return Ok($"DELETE method with id {id}");
    }
}Non-RESTful Style
[Route("[controller]/[action]")]
public class MyController : BasicController {
    // GET: /My/GetAll
    [HttpGet]
    public IActionResult GetAll() {
        // Implement logic to retrieve resources
        return Ok("GET method");
    }

    // GET: /My/GetById/1
    [HttpGet("{id}")]
    public IActionResult GetById(int id) {
        // Implement logic to retrieve a specific resource
        return Ok($"GET method with id {id}");
    }

    // POST: /My/Create
    [HttpPost]
    public IActionResult Create([FromBody] MyModel model) {
        // Implement logic to add a resource
        return Ok("POST method");
    }

    // POST: /My/Update/1
    [HttpPost("{id}")]
    public IActionResult Update(int id, [FromBody] MyModel model) {
        // Implement logic to update a resource
        return Ok($"PUT method with id {id}");
    }

    // POST: /My/Delete/1
    [HttpPost("{id}")]
    public IActionResult Delete(int id) {
        // Implement logic to delete a resource
        return Ok($"DELETE method with id {id}");
    }
}Adding a Prefix
[Route("api/[controller]")]
public class MyController : BasicController {
    // GET: api/My
    [HttpGet]
    public IActionResult Get() {
        // Implement logic to retrieve resources
        return Ok("GET method");
    }
}Note that in the past, with ASP.NET Framework Web API, HTTP verbs could be identified by the start of the Action name (e.g., GetAll() corresponded to a GET request). Now, it is the same as MVC, using HttpGet, HttpPost, HttpPut, HttpPatch, and HttpDelete attributes to explicitly identify them. When no attribute is set, it defaults to a GET request.
TIP
- When the
ApiControllerattribute is set, you cannot access actions via conventional routing defined by methods likeUseEndpoints(),UseMvc(), orUseMvcWithDefaultRoute(). - When using methods like
UseMvc()to set up routing, conventional routing uses curly braces{}to represent parameters, e.g., "{controller=Home}/{action=Index}/{id?}"; whereas in theRouteattribute, square brackets[]are used, e.g., "[controller]/[action]".
Automatic HTTP 400 Responses
In ASP.NET Core Web API, the automatic HTTP 400 response mechanism eliminates the need to manually validate the Request Model's validity. This feature is implemented via the built-in ModelStateInvalidFilter, so you no longer need to manually execute the following code for validation as in the past:
if (!ModelState.IsValid) {
    return BadRequest(ModelState);
}Binding Source Parameter Inference
ASP.NET Core provides the following attributes to configure parameter binding:
FromBody: Request body. This attribute is used to bind data from the HTTP request body, typically for POST requests where data is sent via the request body.FromForm: Form data in the request body. This attribute can bind data from HTML forms, typically for POST requests where data is submitted as a form.FromHeader: Request header. This attribute is used to extract data from HTTP request headers, such as specific header values.FromQuery: Query string parameters. This attribute can bind data from URL query strings, typically for GET requests.FromRoute: Route data from the current request. This attribute is used to bind data extracted from the route, typically for route parameters defined in the route.FromServices: Request service injected as an action parameter. This attribute can bind services from the DI (Dependency Injection) container, making them available in action methods.
Automatic inference rules are as follows:
FromBody: Automatically infers complex type parameters not registered in the DI container, but ignores special built-in types likeIFormCollectionandCancellationToken.FromForm: Specifically infers parameters of typesIFormFileandIFormFileCollection. It does not infer any simple or custom types.FromRoute: Infers based on parameter names that match route template parameters. If multiple routes match the parameter, the system treats it asFromRoute.FromQuery: Infers for any other parameters that are not specific to the route.
Multipart/Form-Data Request Inference
When the parameter type is IFormFile or IFormFileCollection, the request content is automatically inferred as multipart/form-data.
Problem Details for Error Status Codes
When the status code is 400 or higher, it returns the ProblemDetails type.
Return Types
In Web API, there are three common return types: concrete types, IActionResult, and ActionResult<T> (added in ASP.NET Core 2.1). If the API needs to return data, ActionResult<T> is recommended. Conversely, if you only need to return status codes or similar information, use IActionResult. Here is how they are used:
Concrete Type
[HttpGet("{id}")]
public string GetById(int? id) {
    // This approach can only return data of a concrete type, not ActionResult
    // if (!id.HasValue)
    // {
    //     return BadRequest("Invalid id");
    // }

    // Return the value directly
    return $"GET method with id {id}";
}IActionResult
[HttpGet("{id}")]
public IActionResult GetById(int? id) {
    // Using IActionResult allows returning various ActionResult types
    if (!id.HasValue) {
        // Return 400 Bad Request
        return BadRequest("Invalid id");
    }

    // To return a value, wrap it in Ok()
    return Ok($"GET method with id {id}");
}[HttpGet("{id}")]
public ActionResult<string> GetById(int? id) {
// Using ActionResult<T> also allows returning various ActionResult types
if (!id.HasValue) {
// Return 400 Bad Request
return BadRequest("Invalid id");
}
// Can also return the value directly
return $"GET method with id {id}";
}Asynchronous Implementation
In this code, the async modifier indicates that this is an asynchronous method, and the return type is changed to Task<T>, which is a common convention. Usually, when using asynchronous methods, we add "Async" to the end of the Action name to clearly indicate that the method is asynchronous.
It is worth noting that when using non-RESTful style, regardless of whether the Action name ends in "Async," the Action in the route will not include "Async." For example: /My/GetById/1. RESTful style is unaffected because it uses HTTP verbs for mapping, which is independent of the Action name.
[HttpGet("{id}")]
public async Task<IActionResult> GetByIdAsync(int id) {
    return await Ok(service.GetByIdAsync(id));
}Swagger
Swagger is a powerful backend API visualization tool. Through Swagger UI, you can easily generate interactive web-based API documentation while providing convenient API testing tools.
In ASP.NET Core Web API, the default Swagger package used is "Swashbuckle.AspNetCore." For a deep dive into complete usage, please refer to Get started with Swashbuckle and ASP.NET Core. Here, I only summarize the parts I use frequently.
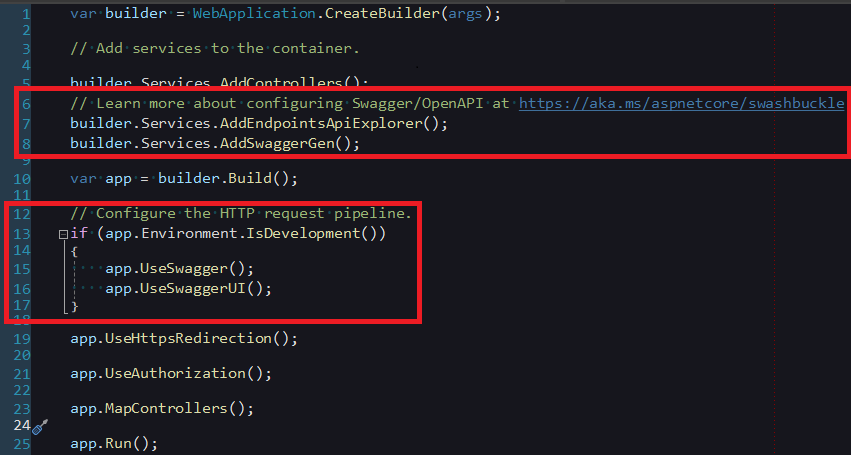
As mentioned earlier when creating a Web API project, when "Enable OpenAPI support" is checked, the code automatically adds the following:
builder.Services.AddEndpointsApiExplorer();
builder.Services.AddSwaggerGen();

if (app.Environment.IsDevelopment()) {
    app.UseSwagger();
    app.UseSwaggerUI();
}AddEndpointsApiExplorer(): A built-in ASP.NET Core method, only needed when Swagger requires support for Minimal APIs.AddSwaggerGen(): Used to inject Swagger-related services into the DI container. Usually, you configure the Swagger generator here to extract API-related information from the application's assemblies, controllers, and comments.UseSwagger(): Enables Swagger Middleware, providing the Swagger document when the application is running. You can view the generated JSON file via "https://{Your Domain}/swagger/v1/swagger.json".UseSwaggerUI(): Enables Swagger UI Middleware, generating an interactive web interface. The default URL is "https://{Your Domain}/swagger/index.html". A page example is as follows: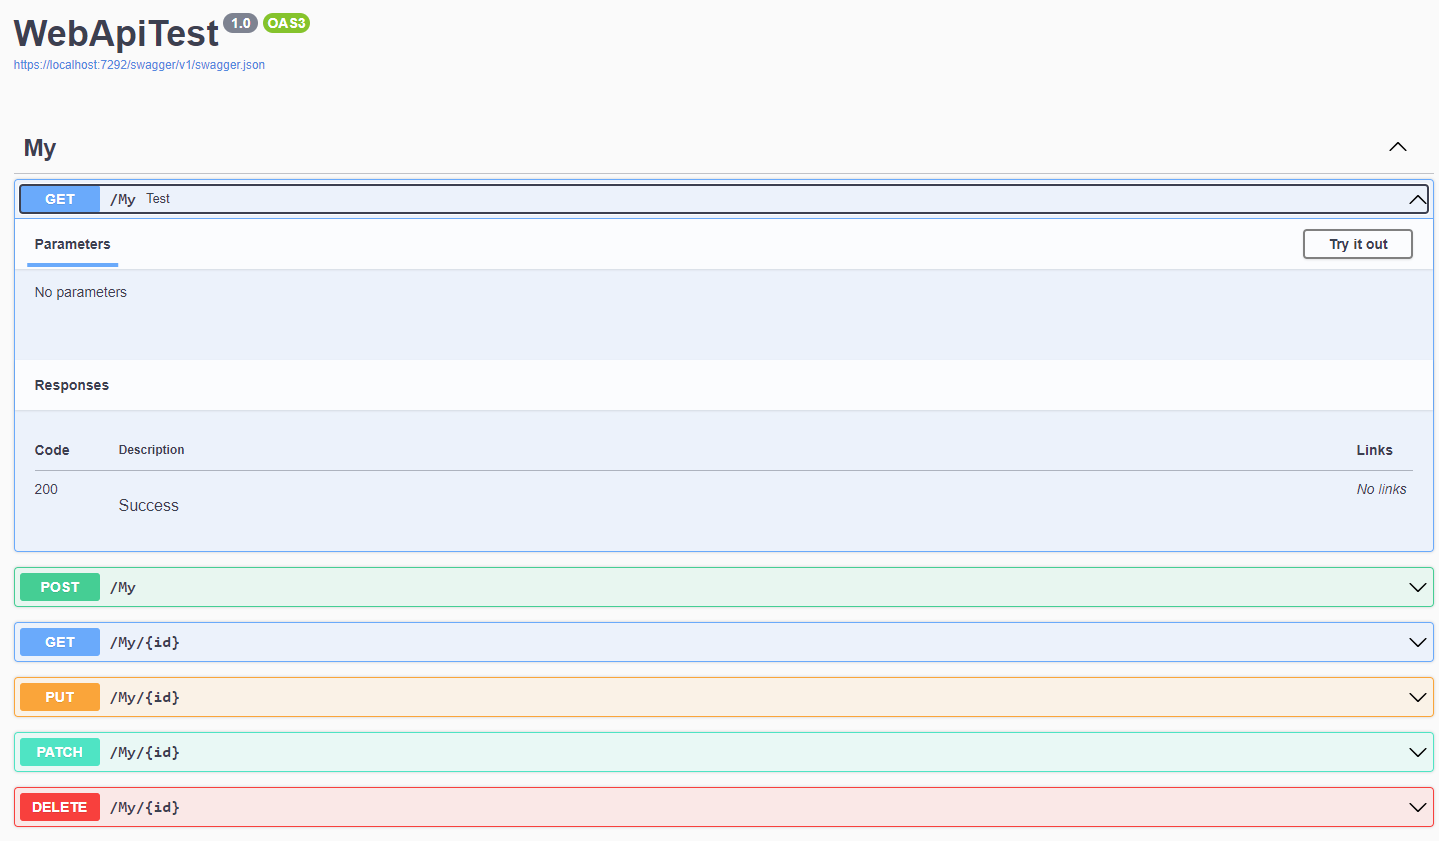
Swagger UI must depend on "swagger.json"; if
UseSwagger()is not used, it will not function correctly. You can use the following code to change the "swagger" part of the URL:csharpapp.UseSwaggerUI(opt => { // Setting RoutePrefix only changes the UI URL, not the JSON location // Do not write "./swagger/v1/swagger.json", otherwise the path will become "https://{Your Domain}/test/swagger/v1/swagger.json" and be incorrect opt.SwaggerEndpoint("/swagger/v1/swagger.json", "v1"); // The URL will become https://{Your Domain}/test/index.html opt.RoutePrefix = "test"; });Additionally, you can use
opt.DocumentTitleto set the title in the<head>tag of the page, or useopt.InjectStylesheet({Your CSS URL})to load additional CSS styles (ensure you have usedapp.UseStaticFiles(), which is not detailed here).
WARNING
In ASP.NET Core Web API, even if HTTP attributes like HttpGet are not explicitly set, the API will be treated as a GET request. However, in Swagger, if an Action lacks the corresponding HTTP attribute, it may lead to failure in correctly displaying related descriptions, thereby affecting the operation of Swagger UI. Therefore, when designing an API, do not design public methods that are not Actions, and explicitly add the corresponding HTTP attribute to each Action to ensure Swagger functions normally.
Adding Extra Input Fields
If you wish to introduce extra parameters in the API design that are not passed via Action parameters, you can add corresponding input fields in Swagger in the following way:
Create a HeaderTokenFilter class, with the code as follows:
public class HeaderTokenFilter : IOperationFilter {
    public void Apply(OpenApiOperation operation, OperationFilterContext context) {
        operation.Parameters ??= new List<OpenApiParameter>();

        operation.Parameters.Add(new OpenApiParameter {
            Name = "Token",
            In = ParameterLocation.Header,
            Required = true,
            Schema = new OpenApiSchema {
                Type = "string"
            }
        });
    }

}Integrate the following configuration into SwaggerGen() in Program.cs:
builder.Services.AddSwaggerGen(opt => {
    opt.OperationFilter<HeaderTokenFilter>();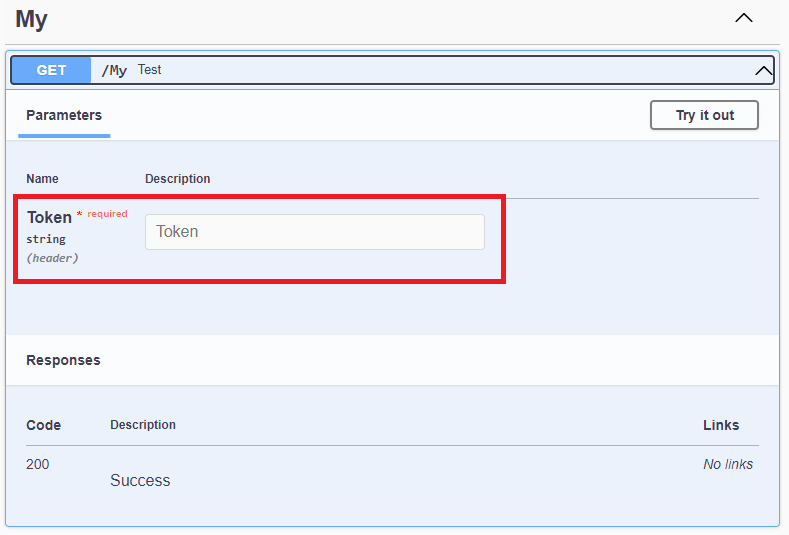
});The added Token input field will be displayed in Swagger UI:
API Information and Description
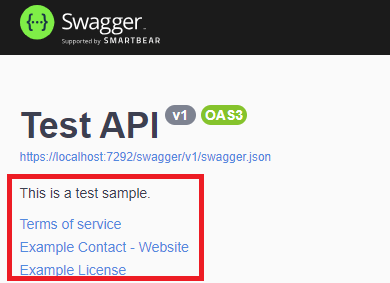
Setting API Author, License, and Description
If you want to specify the API's author, license information, and description, you can configure it with the following code:
builder.Services.AddSwaggerGen(opt => {
    opt.SwaggerDoc("v1", new OpenApiInfo {
        Version = "v1",
        Title = "Test API",
        Description = "This is a test sample.",
        TermsOfService = new Uri("https://example.com/terms"),
        Contact = new OpenApiContact {
            Name = "Example Contact",
            Url = new Uri("https://example.com/contact")
        },
        License = new OpenApiLicense {
            Name = "Example License",
            Url = new Uri("https://example.com/license")
        },
    });
});The information presented in Swagger is as follows:
The corresponding swagger.json content is as follows:
"info": {
    "title": "Test API",
    "description": "This is a test sample.",
    "termsOfService": "https://example.com/terms",
    "contact": {
      "name": "Example Contact",
      "url": "https://example.com/contact"
    },
    "license": {
      "name": "Example License",
      "url": "https://example.com/license"
    },
    "version": "v1"
}Integrating Web API XML Comments into Swagger
Configure the following in the csproj file:
<PropertyGroup>
  <!--Generate documentation file-->
  <GenerateDocumentationFile>true</GenerateDocumentationFile>
  <!--Only set if you want to customize the path and filename-->
  <!--<DocumentationFile>D:\\Doc.xml</DocumentationFile>-->
  <!--If documentation is enabled, it will cause warnings for all public and protected members without XML comments, so hide them-->
  <NoWarn>$(NoWarn);1591</NoWarn>
</PropertyGroup>Integrate the following configuration into SwaggerGen() in Program.cs:
builder.Services.AddSwaggerGen(opt => {
    // If DocumentationFile is set, change the XML location accordingly
    string xmlFilename = $"{Assembly.GetExecutingAssembly().GetName().Name}.xml";
    opt.IncludeXmlComments(Path.Combine(AppContext.BaseDirectory, xmlFilename));
});Add XML comments to the Action, for example:
/// <summary>
/// Gets information for a specific item.
/// </summary>
/// <param name="id">The unique identifier for the item.</param>
/// <returns>Information about the item.</returns>
/// <remarks>
/// Sample request:
///     GET: /My/1
/// </remarks>
/// <response code="400">If the identifier is null.</response>
[HttpGet("{id}")]
public ActionResult<string> GetById(int? id) {
    if (!id.HasValue) {
        return BadRequest();
    }
    return $"GET method with id {id}";
}Swagger UI will display the corresponding comments:
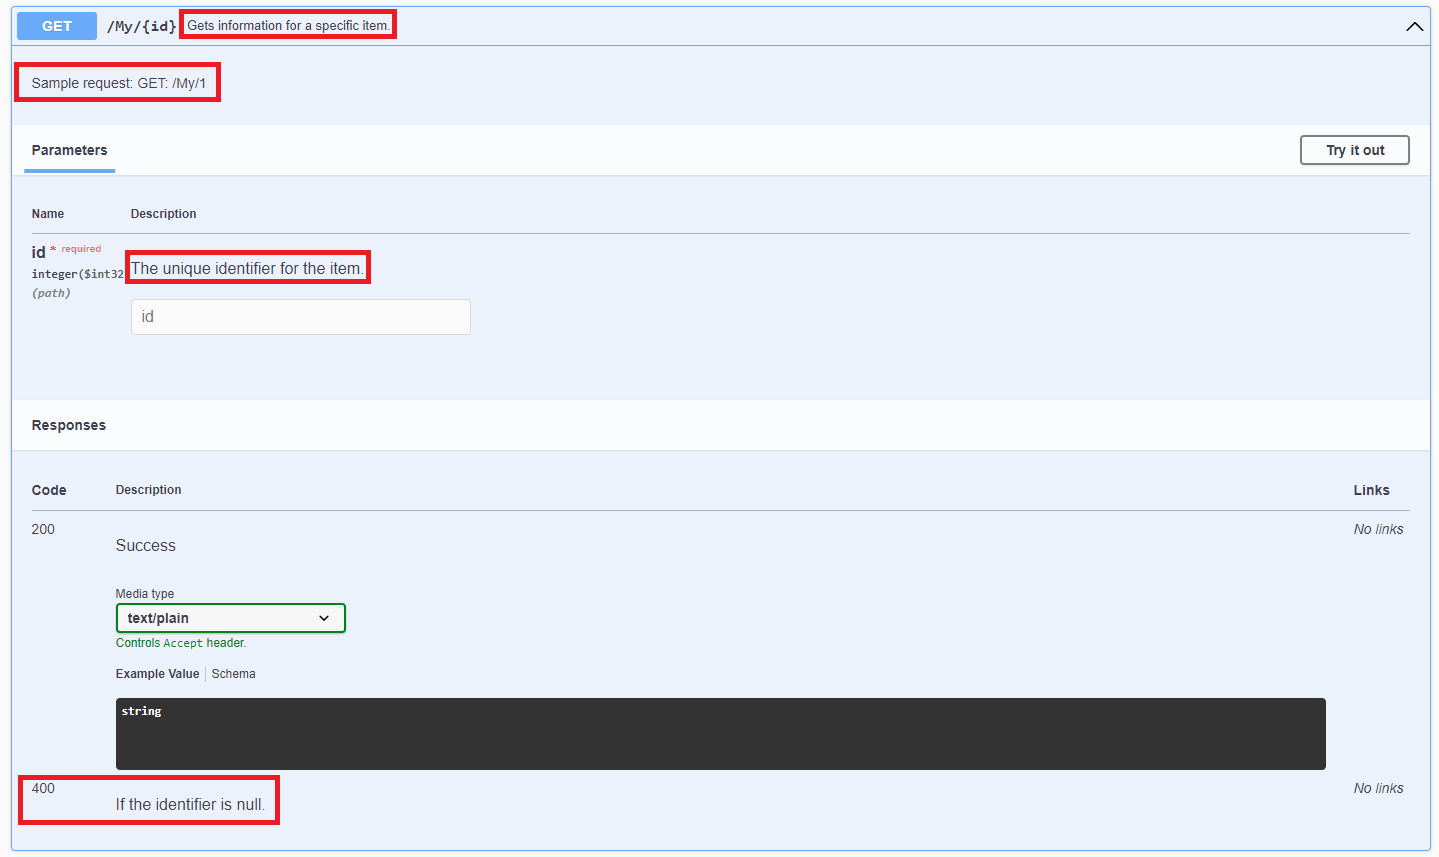
swagger.json will also add summary, description, and 400 content:
"get": {
    "tags": [
      "My"
    ],
    "summary": "Gets information for a specific item.",
    "description": "Sample request:\r\n    GET: /My/1",
    "parameters": [
      {
        "name": "id",
        "in": "path",
        "description": "The unique identifier for the item.",
        "required": true,
        "schema": {
          "type": "integer",
          "format": "int32"
        }
      }
    ],
    "responses": {
      "200": {
        "description": "Success",
        "content": {
          "text/plain": {
            "schema": {
              "type": "string"
            }
          },
          "application/json": {
            "schema": {
              "type": "string"
            }
          },
          "text/json": {
            "schema": {
              "type": "string"
            }
          }
        }
      },
      "400": {
        "description": "If the identifier is null."
      }
    }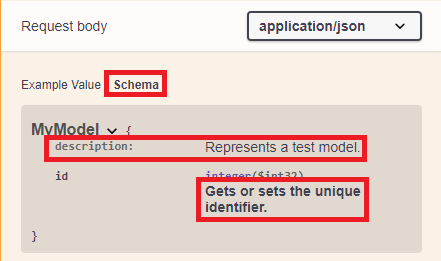
},XML Comments on Input Model or Output Model
Add XML comments to the Input Model class, for example:
/// <summary>
/// Represents a test model.
/// </summary>
public class MyModel {
    /// <summary>
    /// Gets or sets the unique identifier.
    /// </summary>
    public int Id { get; set; }
}Swagger UI will display the corresponding comments:
swagger.json will also add description content:
"components": {
    "schemas": {
      "MyModel": {
        "type": "object",
        "properties": {
          "id": {
            "type": "integer",
            "description": "Gets or sets the unique identifier.",
            "format": "int32"
          }
        },
        "additionalProperties": false,
        "description": "Represents a test model."
      },
      "MyPatchModel": {
        "type": "object",
        "additionalProperties": false
      }
    }
}Change Log
- 2023-08-04 Initial version created.