Applications of Web.config (App.config) in .NET Framework
Publishing Different Configuration Files Based on Build Configurations
Normally, Web.config (App.config) settings differ between local development, testing, and production environments. It is cumbersome to manually update settings every time the application is updated. Furthermore, if you choose not to update the Web.config (App.config) during deployment, you risk forgetting to adjust settings in the test/development environments when new configurations are added or modified.
One approach is to overwrite the configuration file with every update, but to generate the environment-specific configuration file during the deployment process.
Build Configurations
If you need to build a project based on different settings, you will need to configure Build Configurations. Different configurations cover generating different configuration files, compiler options, or producing different compilation results based on project constants. For details, please refer to "Understand build configurations".
The default build configurations are debug and release, which can be switched in the IDE.

Web Project Publishing
Regarding project publishing, this article only covers folder publishing. I have not explored other publishing methods; if needed, please refer to "Quickstart: Deploy an ASP.NET web app".
Adding a Publish Profile
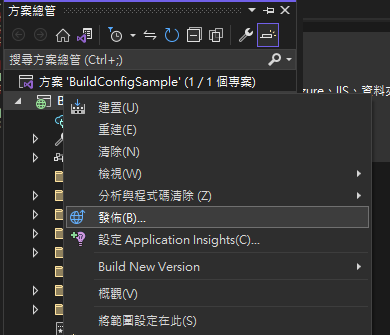
Right-click the project and select "Publish".
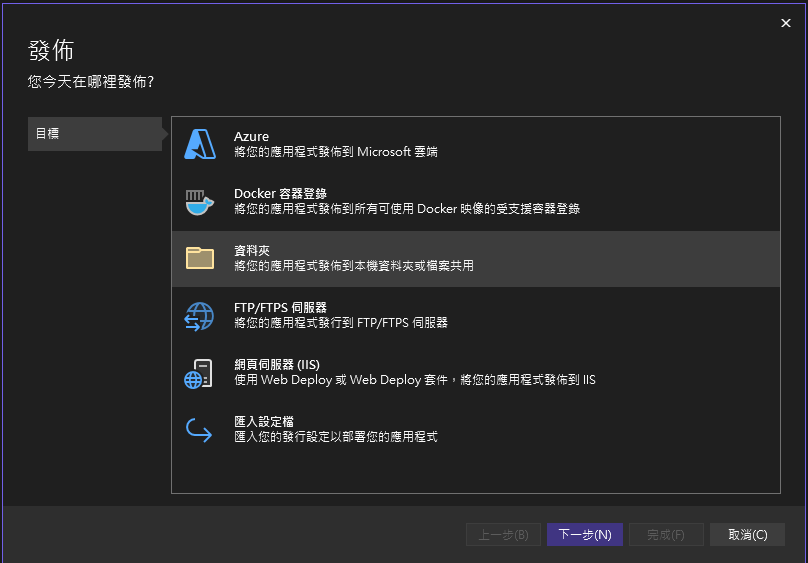
Click "Add a publish profile".

This article only discusses folder publishing, so select "Folder".
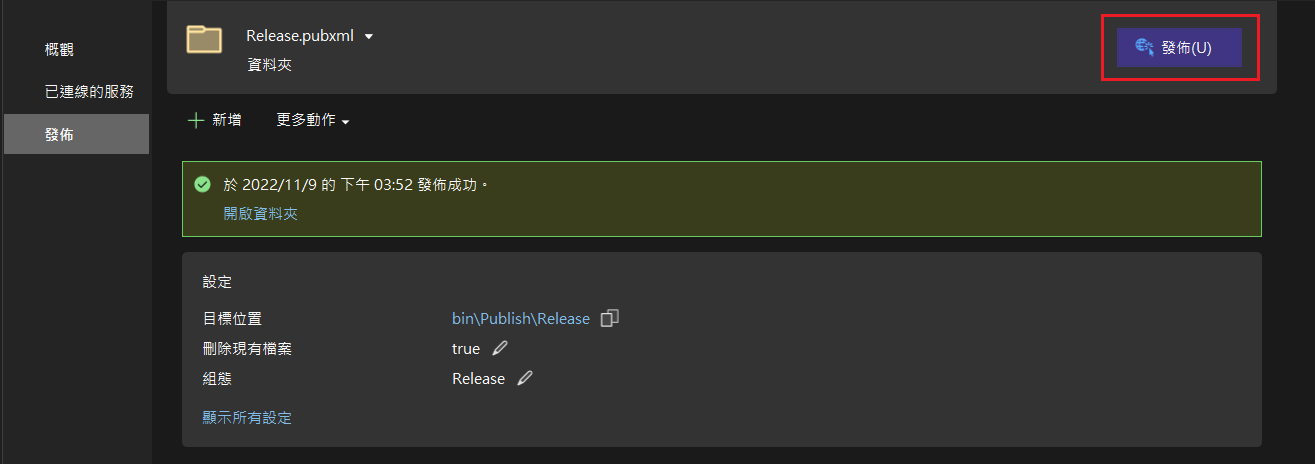
Set the output folder. I usually set it to
bin\Publish\{ConfigurationName}. Here, I set it tobin\Publish\Release.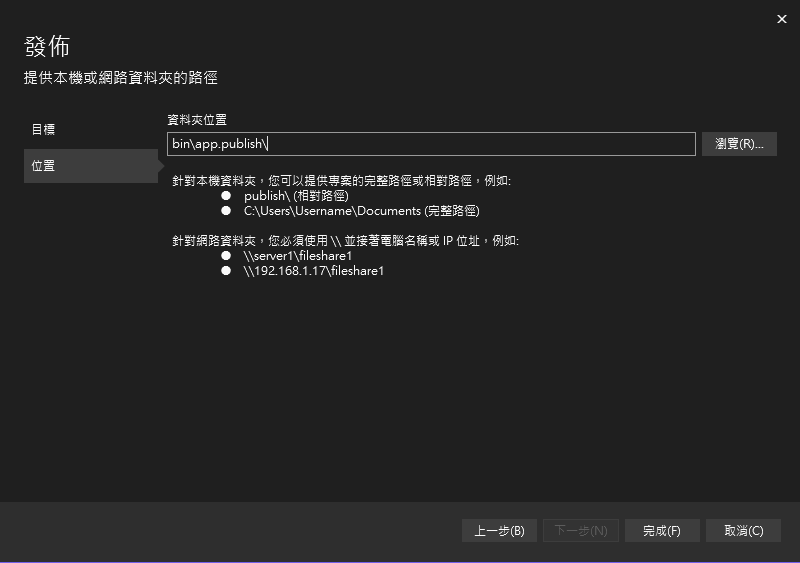
After adding, it is recommended to rename the publish profile to match the configuration name or provide a brief description.
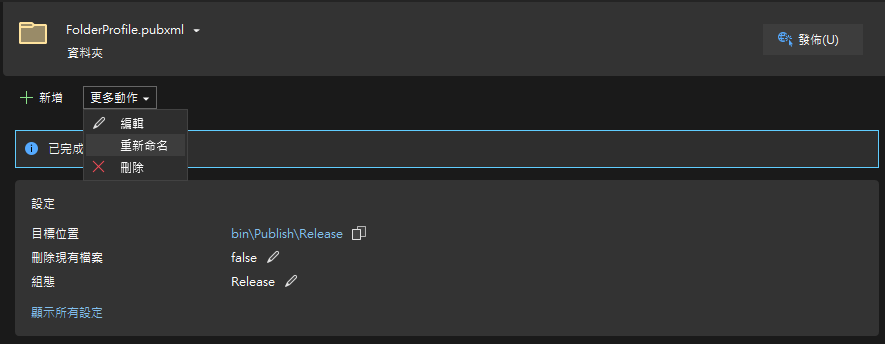
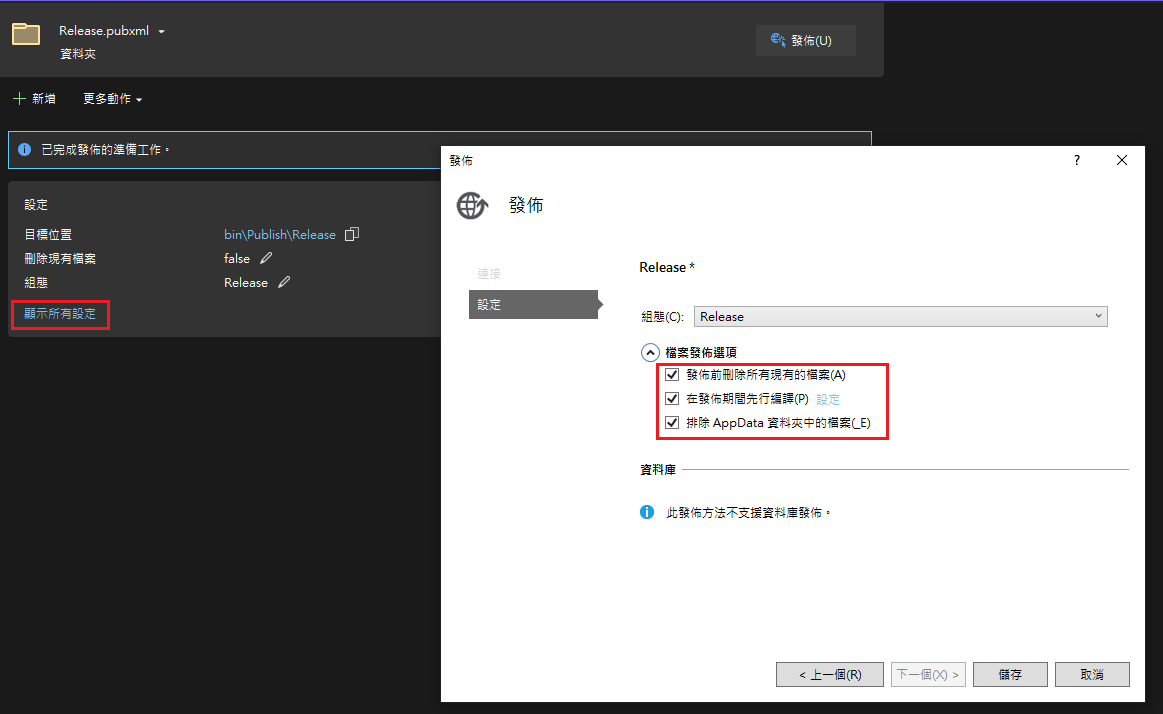
Edit the publish settings. Basic settings can be edited via the UI. I check all boxes here, but in practice, please adjust according to your needs. For example, if you are publishing to a website and set it to "Delete all existing files prior to publish," it will cause temporary files stored on the site (e.g., uploaded files) to be deleted as well.
You can directly modify the XML to change publish settings, for example, by adding
<ExcludeFilesFromDeployment>packages.config;Scripts\_references.js</ExcludeFilesFromDeployment>to exclude specific files during deployment. As for the specific available XML publish settings, I have not found relevant documentation on MSDN.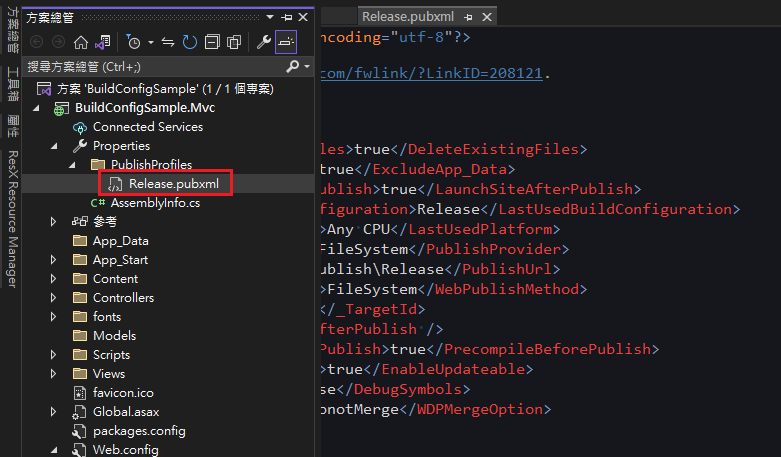
TIP
When a publish profile is created, a file named "{Profile}.pubxml.user" is also generated. The purpose of this file is unclear; it looks more like a publish log, which differs from the MSDN description. In any case, this file should not be included in version control. In fact, the default Visual Studio ".gitignore" ignores user setting files with the ".user" extension.
Web.config Transform
When creating a new Web project, you will find three default config files in the project root: "Web.config", "Web.Debug.config", and "Web.Release.config". However, when building the project, you will notice that it always uses the "Web.config" settings. The other two configs are actually used to transform parts of "Web.config" during publishing.
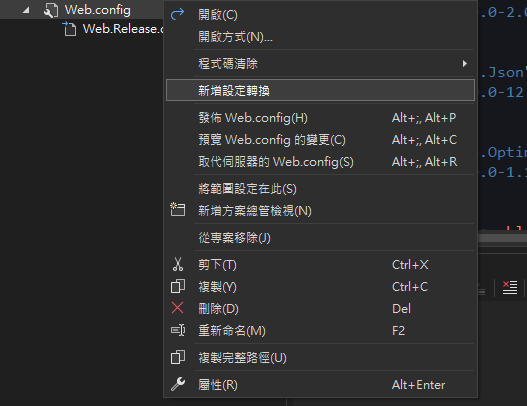
- If you find that the "Web.{ConfigurationName}.config" file corresponding to a build configuration is missing (perhaps due to accidental deletion or creating a new build configuration), you can right-click on "Web.config" and select "Add Config Transform" to create the missing config file.
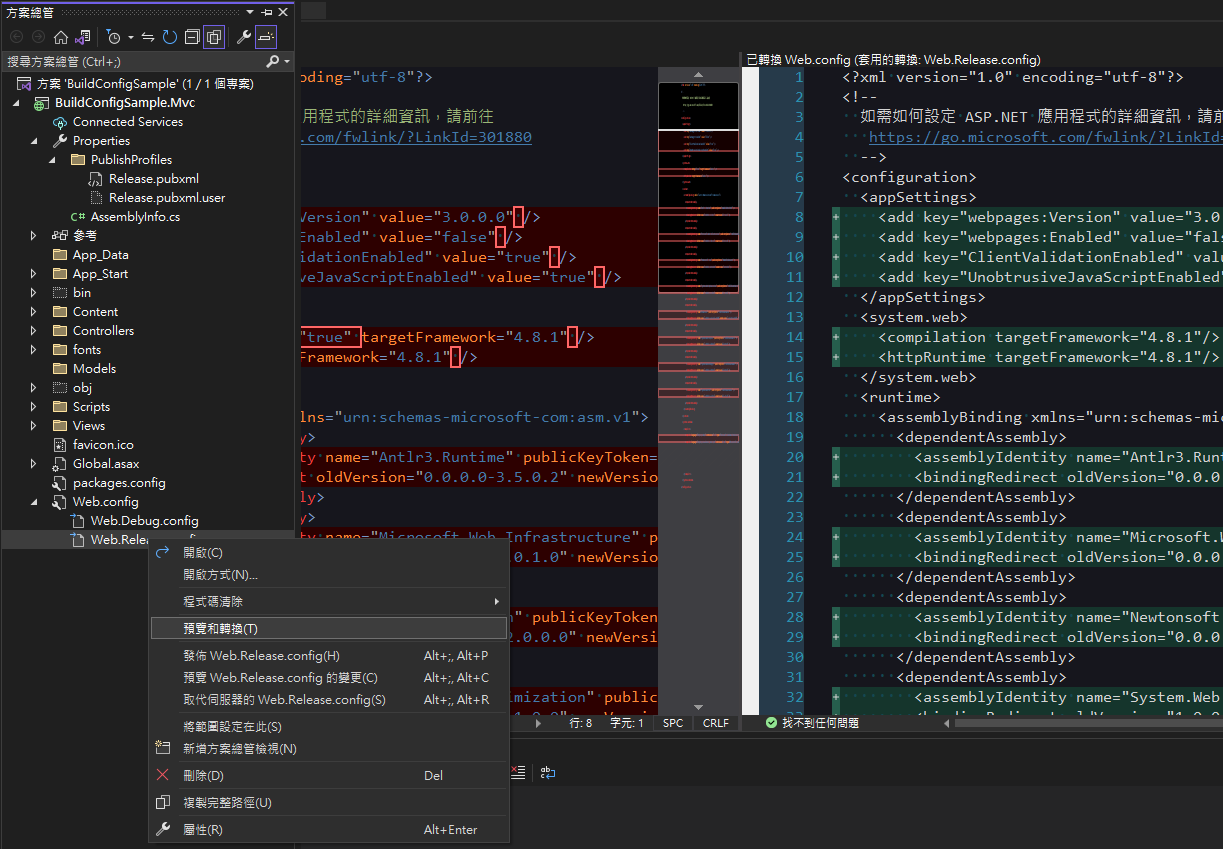
- Right-click on "Web.{ConfigurationName}.config" and select "Preview Transform" to view the transformation results.
Transform replacement mechanism. Transform uses XML structure to locate content to be replaced. The
xdt:Transformattribute sets the replacement method. Let's use the following example for explanation:xml<a> <b> <c> <e name="e1" value="v1"></e> <e name="e2" value="v2"></e> </c> <d></d> </b> </a>If you want to replace the content of the
<d>node, you need to prepare an XML that includes the<d>node and all its parent nodes, as shown below:xml<a> <b> <d xdt:Transform="Replace"></d> </b> </a>For nodes like
<e>where there are multiple nodes with the same name under the same parent, you need to use thexdt:Locatorattribute to locate them. For example, if you want to replace<e name="e1"></e>, the XML content would be:xml<a> <b> <c> <e name="e1" value="v11" xdt:Locator="Match(name)" xdt:Transform="SetAttributes"></e> </c> </b> </a>Common transformation settings.
Replacing
connectionStrings.xml<!--Replace all connectionStrings--> <connectionStrings xdt:Transform="Replace"> <add name="Default" connectionString="{connectionString}" providerName="System.Data.SqlClient" /> </connectionStrings> <!--Replace only a single string--> <add name="Default" connectionString="{connectionString}" providerName="System.Data.SqlClient" xdt:Locator="Match(name)" xdt:Transform="SetAttributes" />Replacing
appSettings.xml<!--It is recommended to replace individually rather than replacing the entire appSettings--> <add key="key" value="value1" xdt:Locator="Match(key)" xdt:Transform="SetAttributes" />Common
system.webreplacement items.xml<!--Change mode="Off" to RemoteOnly and add defaultRedirect --> <customErrors mode="RemoteOnly" xdt:Transform="SetAttributes" /> <!--Change enableVersionHeader to false--> <httpRuntime enableVersionHeader="false" xdt:Transform="SetAttributes(enableVersionHeader)" /> <!--Change requireSSL to true--> <httpCookies requireSSL="true" xdt:Transform="SetAttributes(requireSSL)" /> <!--Remove debug="true" setting--> <compilation xdt:Transform="RemoveAttributes(debug)" />
For the complete Transform syntax, please refer to "Web.config Transformation Syntax for Web Project Deployment Using Visual Studio".
Publishing
After selecting publish, you will see the output files in the target folder. At this point, you will find that the generated "Web.config" contains the merged content.
Example
Original Web.config
<?xml version="1.0" encoding="utf-8"?>
<configuration>
  <connectionStrings>
    <add name="MyDB" connectionString="Data Source=SQLServer;Initial Catalog=MyDB;Integrated Security=True" />
  </connectionStrings>
  <appSettings>
    <add key="webpages:Version" value="3.0.0.0" />
    <add key="webpages:Enabled" value="false" />
    <add key="ClientValidationEnabled" value="true" />
    <add key="UnobtrusiveJavaScriptEnabled" value="true" />
    <add key="MyKey" value="MyValue" />
  </appSettings>
  <system.web>
    <compilation debug="true" targetFramework="4.8.1" />
    <customErrors mode="Off" />
    <httpRuntime targetFramework="4.8.1" />
    <httpCookies requireSSL="false" />
  </system.web>
  <!--Subsequent content unchanged, omitted here-->
</configuration>Web.Release.config
<?xml version="1.0" encoding="utf-8"?>
<configuration xmlns:xdt="http://schemas.microsoft.com/XML-Document-Transform">
  <connectionStrings>
    <add name="MyDB" connectionString="Data Source=ReleaseSQLServer;Initial Catalog=MyReleaseDB;Integrated Security=True"
         xdt:Transform="SetAttributes" xdt:Locator="Match(name)" />
  </connectionStrings>
  <appSettings>
    <add key="MyKey" value="MyReleaseValue" xdt:Transform="SetAttributes" xdt:Locator="Match(key)" />
  </appSettings>
  <system.web>
    <compilation xdt:Transform="RemoveAttributes(debug)" />
    <customErrors mode="RemoteOnly" xdt:Transform="SetAttributes" />
    <httpRuntime enableVersionHeader="false"
                 xdt:Transform="SetAttributes(enableVersionHeader)" />
    <!--Change requireSSL to true-->
    <httpCookies requireSSL="true"
                 xdt:Transform="SetAttributes(requireSSL)" />
  </system.web>
</configuration>Published Web.config
<?xml version="1.0" encoding="utf-8"?>
<configuration>
  <connectionStrings>
    <add name="MyDB" connectionString="Data Source=ReleaseSQLServer;Initial Catalog=MyReleaseDB;Integrated Security=True" />
  </connectionStrings>
  <appSettings>
    <add key="webpages:Version" value="3.0.0.0" />
    <add key="webpages:Enabled" value="false" />
    <add key="ClientValidationEnabled" value="true" />
    <add key="UnobtrusiveJavaScriptEnabled" value="true" />
    <add key="MyKey" value="MyReleaseValue" />
  </appSettings>
  <system.web>
    <compilation targetFramework="4.8.1" />
    <customErrors mode="RemoteOnly" />
    <httpRuntime targetFramework="4.8.1" enableVersionHeader="false" />
    <httpCookies requireSSL="true" />
  </system.web>
  <runtime>
  <!--Subsequent content unchanged, omitted here-->
</configuration>Non-Web Project Publishing
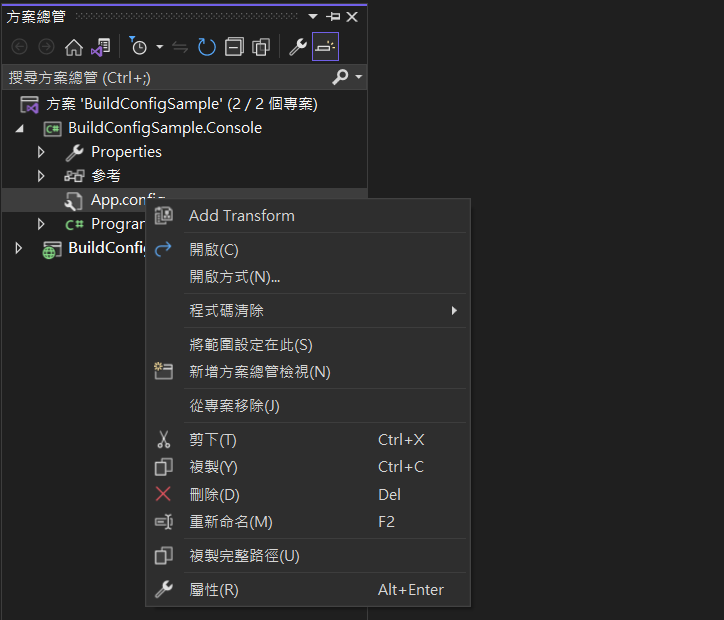
Non-Web projects do not support "App.config" Transform by default, so you need to install other packages to handle it.
Packages
- Visual Studio: Install "SlowCheetah" in Extensions.
- NuGet: Install "Microsoft.VisualStudio.SlowCheetah" in the project where you want to use Config Transform.
After installing "SlowCheetah" in Visual Studio, an "Add Transform" option will be added to the right-click menu of App.config in non-Web projects, allowing you to generate configs for other configurations.
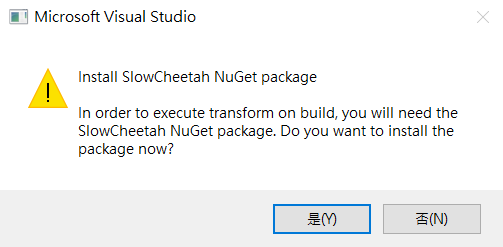
If "Microsoft.VisualStudio.SlowCheetah" is not installed via NuGet, it will prompt you and install it automatically.
TIP
Actually, Visual Studio has another extension called "ConfigTransformation" that supports Config Transform without requiring an additional NuGet package installation in the project. However, Visual Studio 2022 does not support this extension, and it can only perform transformations on XML files with a full config structure (root node is <configuration />).
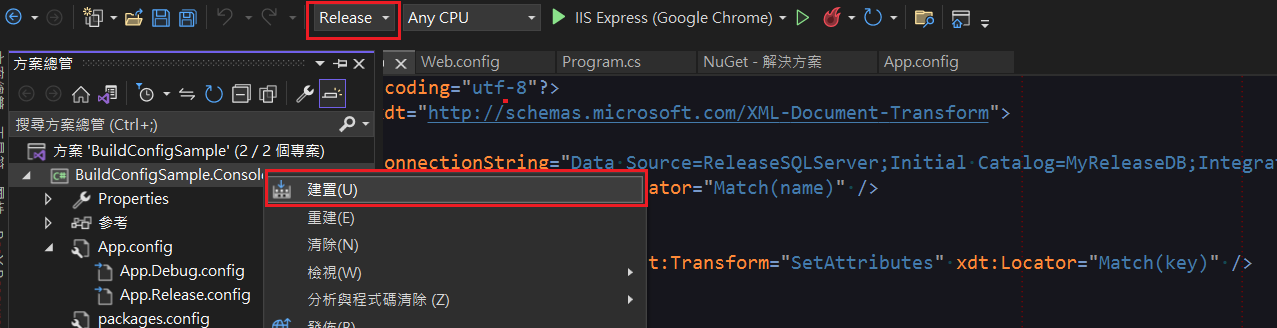
Build
Publishing for non-Web ".NET Framework" projects uses ClickOnce and cannot be published to a folder like Web projects. However, its build process triggers Config Transform, so just select the configuration you want to publish and build the project. It is recommended to delete the "bin" folder before building the project.
Example
Original App.config
<?xml version="1.0" encoding="utf-8" ?>
<configuration>
  <connectionStrings>
    <add name="MyDB" connectionString="Data Source=SQLServer;Initial Catalog=MyDB;Integrated Security=True" />
  </connectionStrings>
  <appSettings>
    <add key="MyKey" value="MyValue" />
  </appSettings>
  <startup>
    <supportedRuntime version="v4.0" sku=".NETFramework,Version=v4.8.1" />
  </startup>
</configuration>App.Release.config
<?xml version="1.0" encoding="utf-8"?>
<configuration xmlns:xdt="http://schemas.microsoft.com/XML-Document-Transform">
  <connectionStrings>
    <add name="MyDB" connectionString="Data Source=ReleaseSQLServer;Initial Catalog=MyReleaseDB;Integrated Security=True"
         xdt:Transform="SetAttributes" xdt:Locator="Match(name)" />
  </connectionStrings>
  <appSettings>
    <add key="MyKey" value="MyReleaseValue" xdt:Transform="SetAttributes" xdt:Locator="Match(key)" />
  </appSettings>
</configuration>Built {ProjectName}.exe.config
<?xml version="1.0" encoding="utf-8"?>
<configuration>
  <connectionStrings>
    <add name="MyDB" connectionString="Data Source=ReleaseSQLServer;Initial Catalog=MyReleaseDB;Integrated Security=True" />
  </connectionStrings>
  <appSettings>
    <add key="MyKey" value="MyReleaseValue" />
  </appSettings>
  <startup>
    <supportedRuntime version="v4.0" sku=".NETFramework,Version=v4.8.1" />
  </startup>
</configuration>Sharing Configuration Files Across Different Projects
If an entire solution has multiple projects that need to connect to the same database—such as a website, multiple schedulers, or Web APIs—and you need to modify all projects every time the database environment changes, you might consider placing <connectionStrings /> in a separate file so that multiple projects can reference it.
Setup Steps
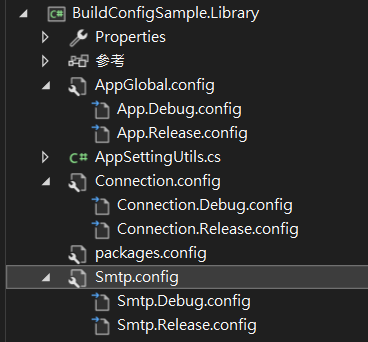
Below, we create a Library project and add three configuration files: "AppGlobal.config", "Connection.config", and "Smtp.config". All three files are configured with Config Transform.
For convenience, these three files will be collectively referred to as external configuration files, and the files generated by Config Transform will be referred to as external configuration settings.
Setting Config Content
Here, we use AppGlobal.config as an example.
AppGlobal.config
<?xml version="1.0" encoding="utf-8" ?>
<appSettings>
  <add key="Test" value="TestValue1" />
</appSettings><?xml version="1.0" encoding="utf-8" ?>
<!--The root node must contain the attribute xmlns:xdt="http://schemas.microsoft.com/XML-Document-Transform" -->
<appSettings xmlns:xdt="http://schemas.microsoft.com/XML-Document-Transform">
<add key="Test" value="TestReleaseValue1" xdt:Transform="SetAttributes" xdt:Locator="Match(key)" />
</appSettings>Adding References from a Web Project
- Install "Microsoft.VisualStudio.SlowCheetah" to handle the transformation of these external configuration files.
- In addition to adding the Library project reference, the Web project needs to add file links to the three new Config files and their related configuration files.
- Select "Add Existing Item" in the Web project.
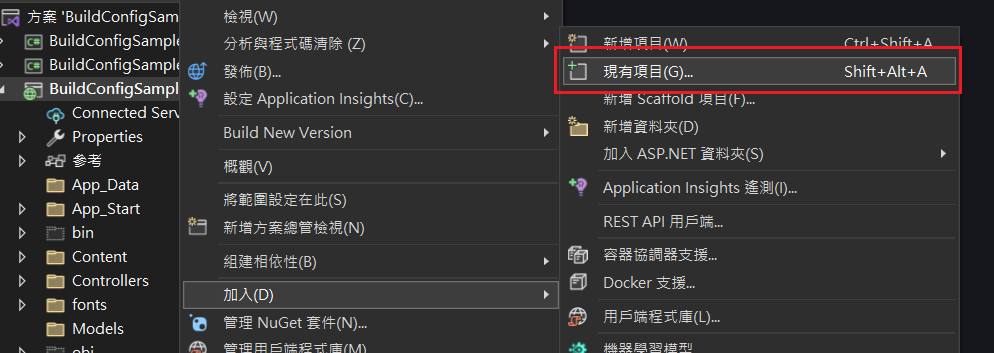
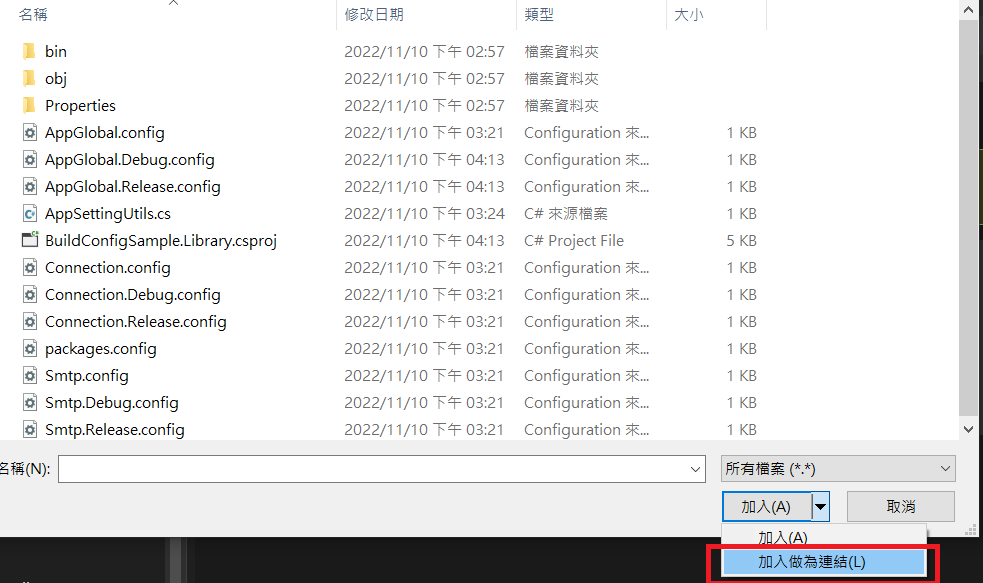
Use the "Add As Link" option to add the external configuration files and their related external configuration settings.
- Open the project file (.csproj) and make the following modifications:
- Add
<TransformOnBuild>true</TransformOnBuild>to indicate that Config Transform should be executed during build. - Add
<CopyToOutputDirectory>Always</CopyToOutputDirectory>to the external configuration files. - Change the external configuration settings from the
<Content />node to the<None />node to prevent them from being published. - Add the
<DependentUpon />node to the external configuration settings so that they are nested under the external configuration file in Visual Studio.
- Add
<Content Include="..\BuildConfigSample.Library\AppGlobal.config">
  <Link>AppGlobal.config</Link>
  <TransformOnBuild>true</TransformOnBuild>
  <CopyToOutputDirectory>Always</CopyToOutputDirectory>
</Content>
<None Include="..\BuildConfigSample.Library\AppGlobal.Debug.config">
  <Link>AppGlobal.Debug.config</Link>
  <DependentUpon>AppGlobal.config</DependentUpon>
  <TransformOnBuild>true</TransformOnBuild>
</None>
<None Include="..\BuildConfigSample.Library\AppGlobal.Release.config">
  <Link>AppGlobal.Release.config</Link>
  <DependentUpon>AppGlobal.config</DependentUpon>
  <TransformOnBuild>true</TransformOnBuild>
</None>
<!--Connection.config and Smtp.config are modified the same way-->- Modify "Web.config" and "Web.Release.config" to externally reference the external configuration files.
The difference between
configSourceandfileattributes is that the latter allows adding other settings for merging.<connectionStrings />and<smtp />cannot usefile.<appSettings />allowsconfigSource, butfileis recommended.If the
keyin the externally referenced file is the same as akeyadded in<appSettings />, the externally referenced value will be used, so you cannot override settings by defining the samekey.- Using the link method to add configuration files means there are no actual files in the project root, causing "Web.config" to fail to find the external configuration files in the same folder when running in Debug mode. Therefore, reference the files under "bin" (we set the external configuration files to "Copy to Output Directory" earlier).
Web.config
xml<configuration> <connectionStrings configSource="bin\Connection.config" /> <appSettings file="bin\AppGlobal.config"> <add key="webpages:Version" value="3.0.0.0" /> <add key="webpages:Enabled" value="false" /> <add key="ClientValidationEnabled" value="true" /> <add key="UnobtrusiveJavaScriptEnabled" value="true" /> <add key="MyKey" value="MyValue" /> </appSettings> <system.net> <mailSettings> <smtp configSource="bin\Smtp.config" /> </mailSettings> </system.net> <!--Subsequent content omitted--> </configuration>Web.Release.config
xml<configuration xmlns:xdt="http://schemas.microsoft.com/XML-Document-Transform"> <connectionStrings configSource="Connection.config" xdt:Transform="SetAttributes" /> <appSettings file="AppGlobal.config" xdt:Transform="SetAttributes"> <add key="MyKey" value="MyReleaseValue" xdt:Transform="SetAttributes" xdt:Locator="Match(key)" /> </appSettings> <system.net> <mailSettings> <smtp configSource="Smtp.config" xdt:Transform="Replace" /> </mailSettings> </system.net> <!--Subsequent content omitted--> </configuration>
Adding References from a Non-Web Project
The steps are the same as for Web projects, but the modifications to the project file and App.config are slightly different.
The external configuration files in the project file use the <None /> node.
<None Include="..\BuildConfigSample.Library\AppGlobal.config">
  <Link>AppGlobal.config</Link>
  <TransformOnBuild>true</TransformOnBuild>
  <CopyToOutputDirectory>Always</CopyToOutputDirectory>
</None>
<None Include="..\BuildConfigSample.Library\AppGlobal.Debug.config">
  <Link>AppGlobal.Debug.config</Link>
  <DependentUpon>AppGlobal.config</DependentUpon>
  <TransformOnBuild>true</TransformOnBuild>
</None>
<None Include="..\BuildConfigSample.Library\AppGlobal.Release.config">
  <Link>AppGlobal.Release.config</Link>
  <DependentUpon>AppGlobal.config</DependentUpon>
  <TransformOnBuild>true</TransformOnBuild>
</None>TIP
The <None /> node and <Content /> correspond to the build actions "None" and "Content" respectively. "Content" is for Web use. For details, please refer to "Build action values".
App.config
In Debug mode, the configuration file itself uses the "{ProjectName}.exe.config" file under "bin{ConfigurationName}", so the path does not need to be specified under "bin".
<?xml version="1.0" encoding="utf-8" ?>
<configuration>
  <connectionStrings configSource="Connection.config" />
  <appSettings file="AppGlobal.config">
    <add key="MyKey" value="MyValue" />
  </appSettings>
  <system.net>
    <mailSettings>
      <smtp configSource="Smtp.config" />
    </mailSettings>
  </system.net>
  <startup>
    <supportedRuntime version="v4.0" sku=".NETFramework,Version=v4.8.1" />
  </startup>
</configuration>App.Release.config
After switching to external references, App.Release.config no longer needs to transform the connectionStrings content.
<?xml version="1.0" encoding="utf-8"?>
<configuration xmlns:xdt="http://schemas.microsoft.com/XML-Document-Transform">
  <appSettings>
    <add key="MyKey" value="MyReleaseValue" xdt:Transform="SetAttributes" xdt:Locator="Match(key)" />
  </appSettings>
</configuration>WARNING
If you are using Entity Framework's Database First, the connection string in the project's App.config cannot be set using an external reference file; otherwise, the Entity Framework UI will not be able to find the configured connection string.
Breaking the Inheritance of Web.config
IIS allows building sub-websites under a website. In this case, the sub-website's Web.config will inherit the parent website's settings, which can sometimes cause conflicts, especially if there are differences in the Framework versions between the two. You can use <location> in the parent website to break the inheritance as follows:
<location path="." inheritInChildApplications="false">
  <system.web>
    <!--...Internal code...-->
  </system.web>
</location>TIP
Theoretically, writing <location /> outside of <system.web /> is sufficient, but if necessary, it can also be added outside other nodes. However, if the project uses Entity Framework's Database First, do not write it outside the <connectionStrings /> layer, otherwise, it will cause the Entity Framework UI to be unable to read the configured connection string (this problem again, orz).
Related Links
Change Log
- 2022-11-10 Initial version created.