在 .NET Framework 裡,有關 Web.config (App.config) 的應用
依不同組建組態發佈不同的設定檔
正常來說,本機開發、測試環境以及正式環境的 Web.config (App.config) 設定都會不一樣,如果每次更新程式時,都要將設定改為對應環境的設定值,過於麻煩;如果選擇更新程式不更新 Web.config (App.config),又有可能會造成有新增或調整設定時,忘記調整測試/開發環境上的設定檔內容。
有一種作法是每次更新程式都覆蓋設定檔,但是在發佈更新程式時,會直接產製對應環境的設定檔。
組建組態
如果有需要依照不同的設定來建置專案時,會需要設定組建組態。 不同的設定涵蓋產出不同的設定檔、編譯選項或依不同的專案常數產出不同的編譯結果,詳情請參閱「了解組建組態」。
預設組建組態有 debug 和 release,可從 IDE 上進行切換。

Web 專案發佈
有關專案發佈的部分,這邊僅針對資料夾發佈的部分進行說明,其他發佈方式我也沒玩過,如果有需要,請參閱「快速入門:發佈 ASP.NET Web 應用程式」。
新增發佈設定檔
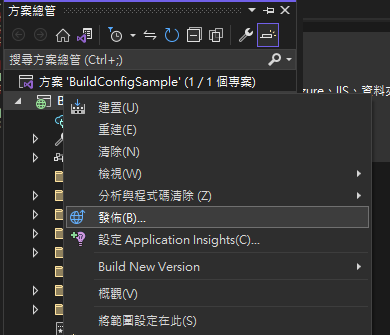
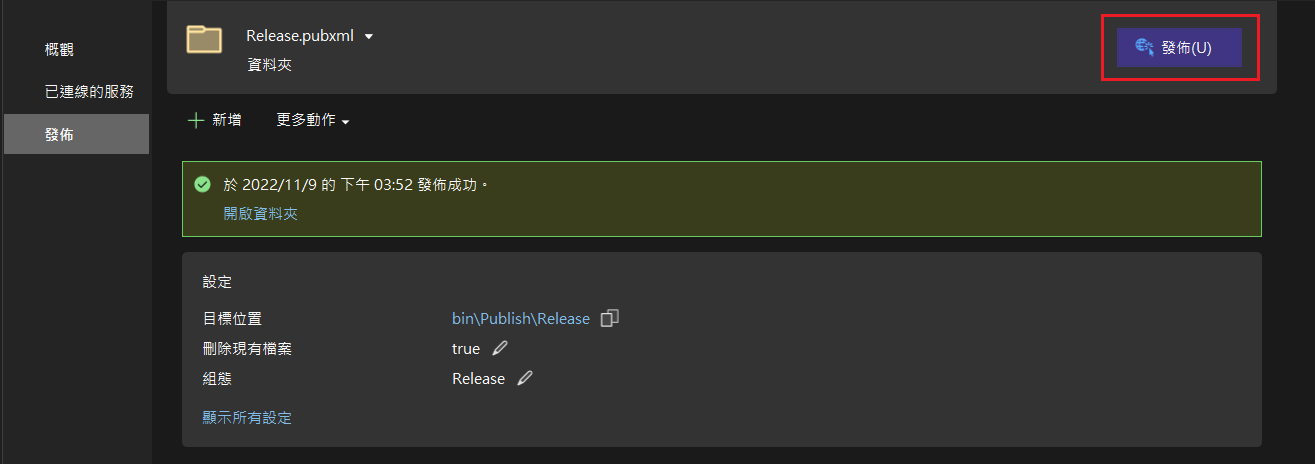
對專案點選右鍵按「發佈」。
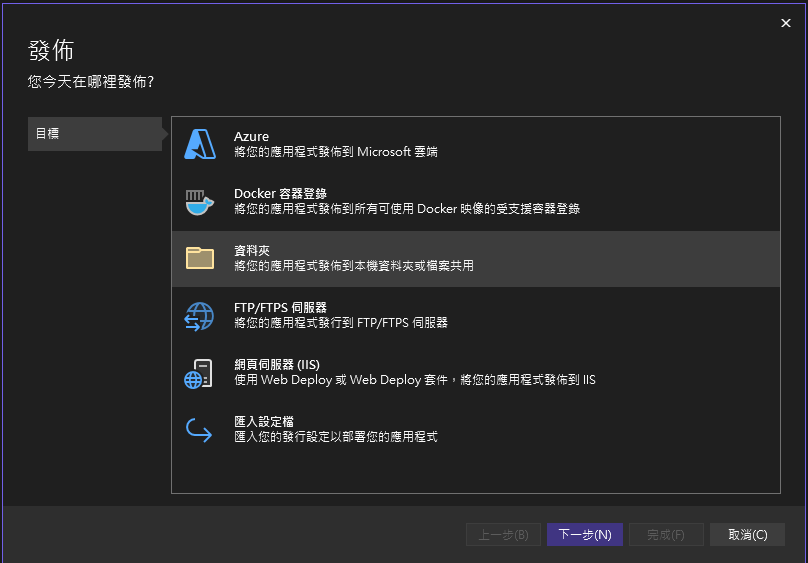
點擊「新增發佈設定」。

這篇文章只講資料夾發佈,所以選擇資料夾。
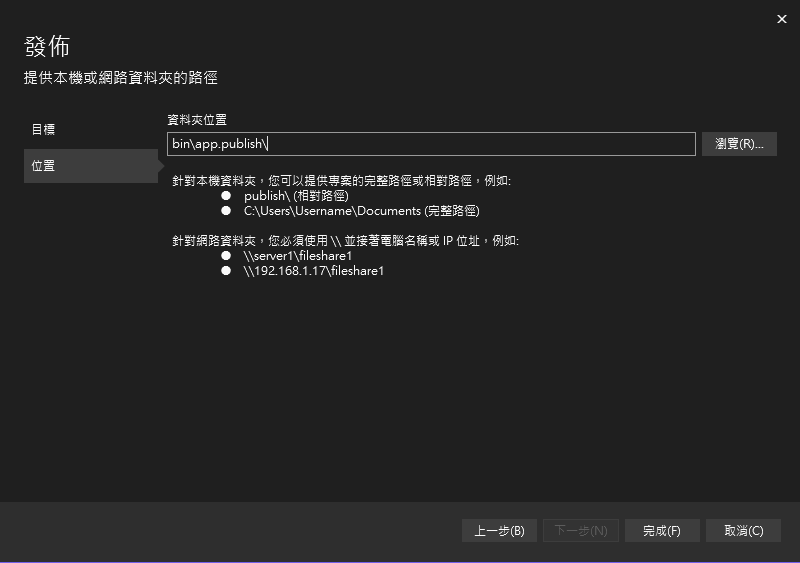
設定輸出資料夾,我習慣上會設定成「bin\Publish{組態名稱}」,這邊設定成「bin\Publish\Release」。
後續新增完建議更改發佈檔名稱,建議和組態名稱一致或有簡易說明。
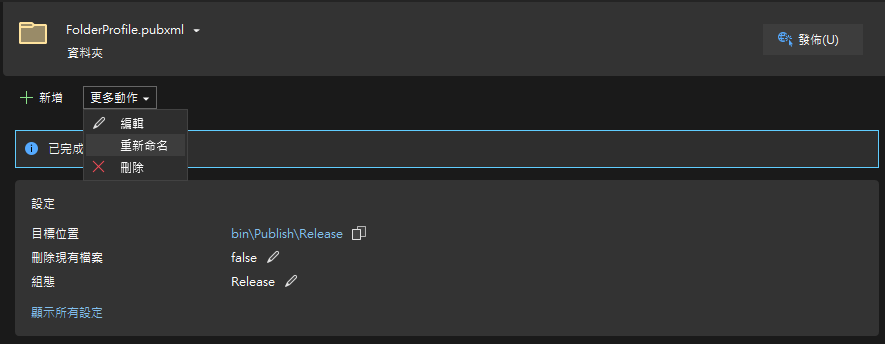
編輯發佈設定,基本的設定可以使用 UI 編輯,這邊我會全打勾,實務上請依需求調整,像是如果是使用發佈到網站,又設定成「發佈前刪除所有的檔案」會造成網站上的儲存的暫存檔案(例如 上傳的檔案)都被一併刪除。
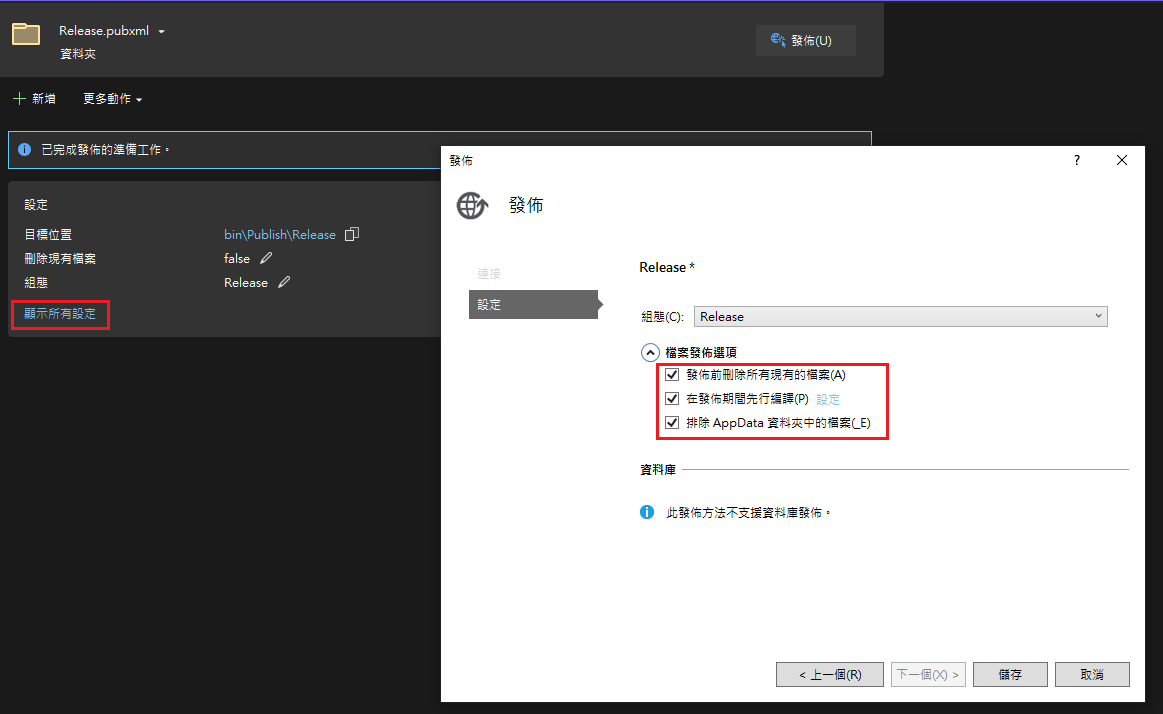
可以直接修改 XML 變更發佈的設定,例如增加
<ExcludeFilesFromDeployment>packages.config;Scripts\_references.js</ExcludeFilesFromDeployment>,使之在發佈時,排除特定檔案,至於 XML 具體有哪些發佈設定,目前並無在 MSDN 上查到相關說明。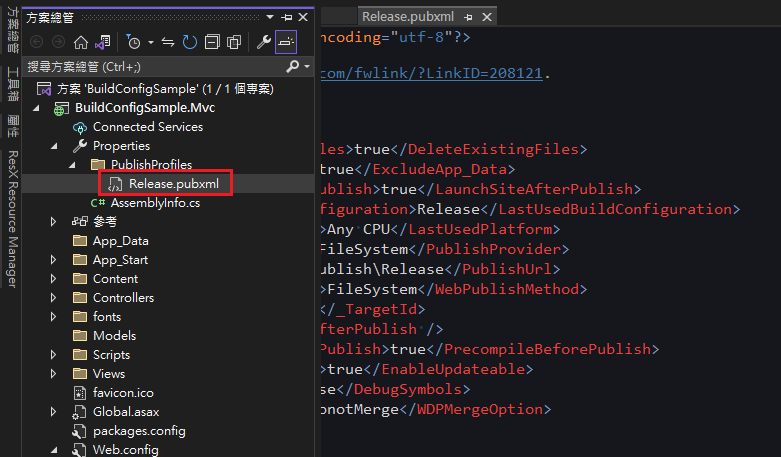
TIP
當建立發佈設定檔時,會再產生一個名為「{Profile}.pubxml.user」的檔案,此檔案不知用途,實際看起來比較像是發佈紀錄,但這就和 MSDN 上說明不同,總之這個檔案是不該進入版控,實際上 Visual Studio 預設的「.gitignore」也會忽略附檔名為「.user」這類使用者設置檔。
Web.config Transform
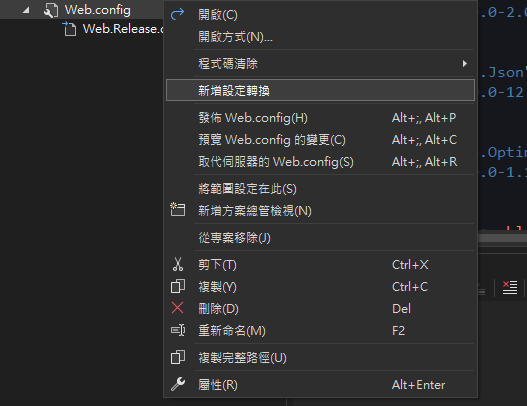
當建立一個新的 Web 專案時,會發現專案根目錄預設有三個 Config 檔案,「Web.config」、「Web.Debug.config」和「Web.Release.config」,但在建置專案時,會發現都是使用「Web.config」的設定,其餘兩個 Config 其實是在發佈時,用來轉換「Web.config」的部分內容。
- 當發現缺漏組建組態對應的「Web.{組態名稱}.config」檔案時(有可能是誤刪除或是有新建其他組建組態),在「Web.config」上點右鍵,可以看到「新增設定轉換」可以點選,點選後就會建立缺漏的 Config 檔案。
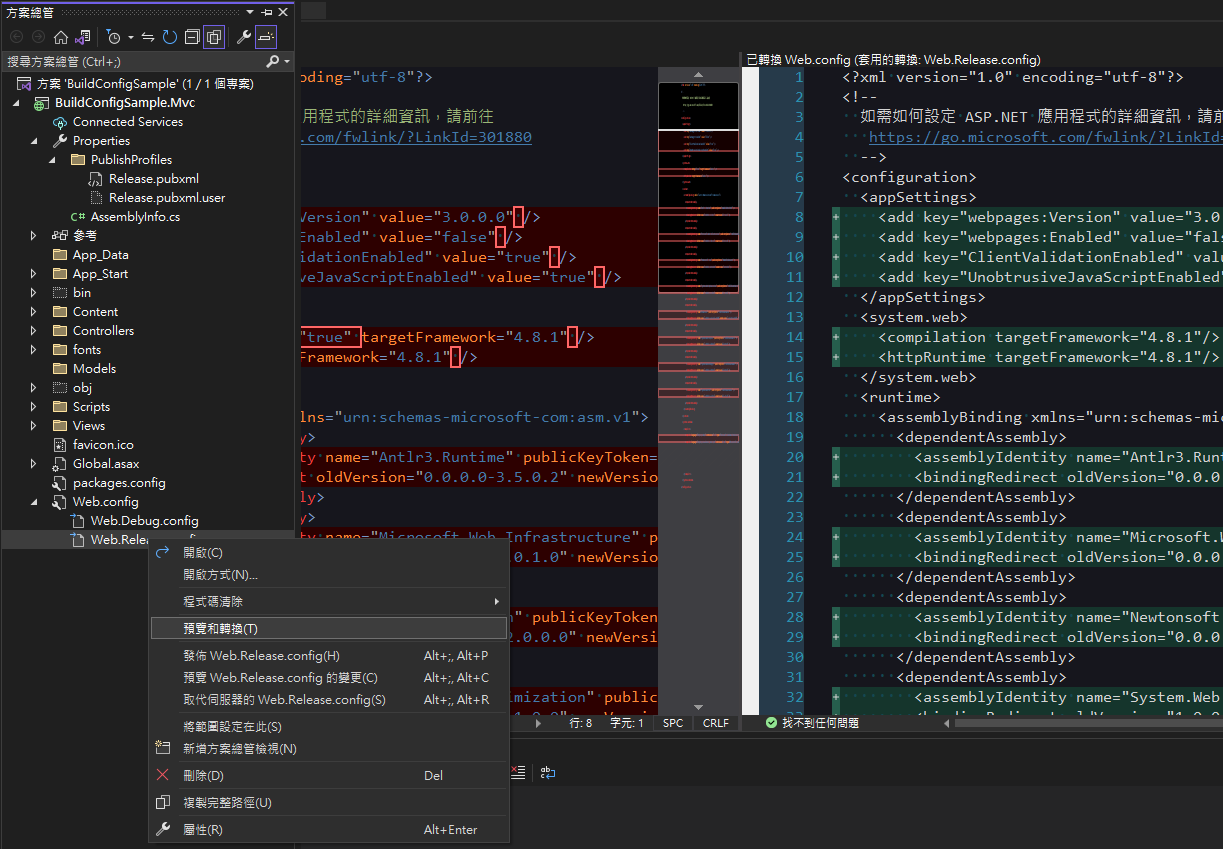
- 對著「Web.{組態名稱}.config」點右鍵,選擇「預覽和轉換」,可以查看轉換結果。
Transform 的替換機制。 Transform 是用 XML 結構來定位要替換內容,
xdt:Transform屬性設定替換方式,使用以下範例內容進行解說。xml<a> <b> <c> <e name="e1" value="v1"></e> <e name="e2" value="v2"></e> </c> <d></d> </b> </a>如果要替換
<d>節點的內容,就需要準備一個包含<d>節點及全部父節點的 XML,結構如下。xml<a> <b> <d xdt:Transform="Replace"></d> </b> </a>而像
<e>這種同一節點底下,有多個相同節點名的,就需要使用屬性xdt:Locator來定位,舉例來說,如果要替換<e name="e1"></e>的話,則 XML 內容為。xml<a> <b> <c> <e name="e1" value="v11" xdt:Locator="Match(name)" xdt:Transform="SetAttributes"></e> </c> </b> </a>常用的轉換設定。
更換
connectionStrings。xml<!--全部的 connectionStrings 都更換--> <connectionStrings xdt:Transform="Replace"> <add name="Default" connectionString="{connectionString}" providerName="System.Data.SqlClient" /> </connectionStrings> <!--只替換單一字串--> <add name="Default" connectionString="{connectionString}" providerName="System.Data.SqlClient" xdt:Locator="Match(name)" xdt:Transform="SetAttributes" />更換
appSettings。xml<!--建議單獨替換,而不是整個 appSettings 都替換--> <add key="key" value="value1" xdt:Locator="Match(key)" xdt:Transform="SetAttributes" />system.web常見替換專案。xml<!--將 mode="Off" 改為 RemoteOnly,並新增 defaultRedirect --> <customErrors mode="RemoteOnly" xdt:Transform="SetAttributes" /> <!--將 enableVersionHeader 改為 false--> <httpRuntime enableVersionHeader="false" xdt:Transform="SetAttributes(enableVersionHeader)" /> <!--將 requireSSL 改為 true--> <httpCookies requireSSL="true" xdt:Transform="SetAttributes(requireSSL)" /> <!--移除 debug="true" 的設定--> <compilation xdt:Transform="RemoveAttributes(debug)" />
完整的 Transform 語法,可以參考「使用 Visual Studio 部署 Web 專案的 Web.config 轉換語法」。
發佈
選擇發佈後,會在目標資料夾看到輸出後的檔案,此時會發現產出的「Web.config」是合併後的內容。
範例
原本 Web.config
<?xml version="1.0" encoding="utf-8"?>
<configuration>
  <connectionStrings>
    <add name="MyDB" connectionString="Data Source=SQLServer;Initial Catalog=MyDB;Integrated Security=True" />
  </connectionStrings>
  <appSettings>
    <add key="webpages:Version" value="3.0.0.0" />
    <add key="webpages:Enabled" value="false" />
    <add key="ClientValidationEnabled" value="true" />
    <add key="UnobtrusiveJavaScriptEnabled" value="true" />
    <add key="MyKey" value="MyValue" />
  </appSettings>
  <system.web>
    <compilation debug="true" targetFramework="4.8.1" />
    <customErrors mode="Off" />
    <httpRuntime targetFramework="4.8.1" />
    <httpCookies requireSSL="false" />
  </system.web>
  <!--後面的沒異動,這邊範例省略-->
</configuration>Web.Release.config
<?xml version="1.0" encoding="utf-8"?>
<configuration xmlns:xdt="http://schemas.microsoft.com/XML-Document-Transform">
  <connectionStrings>
    <add name="MyDB" connectionString="Data Source=ReleaseSQLServer;Initial Catalog=MyReleaseDB;Integrated Security=True"
         xdt:Transform="SetAttributes" xdt:Locator="Match(name)" />
  </connectionStrings>
  <appSettings>
    <add key="MyKey" value="MyReleaseValue" xdt:Transform="SetAttributes" xdt:Locator="Match(key)" />
  </appSettings>
  <system.web>
    <compilation xdt:Transform="RemoveAttributes(debug)" />
    <customErrors mode="RemoteOnly" xdt:Transform="SetAttributes" />
    <httpRuntime enableVersionHeader="false"
                 xdt:Transform="SetAttributes(enableVersionHeader)" />
    <!--將 requireSSL 改為 true-->
    <httpCookies requireSSL="true"
                 xdt:Transform="SetAttributes(requireSSL)" />
  </system.web>
</configuration>發佈後的 Web.config
<?xml version="1.0" encoding="utf-8"?>
<configuration>
  <connectionStrings>
    <add name="MyDB" connectionString="Data Source=ReleaseSQLServer;Initial Catalog=MyReleaseDB;Integrated Security=True" />
  </connectionStrings>
  <appSettings>
    <add key="webpages:Version" value="3.0.0.0" />
    <add key="webpages:Enabled" value="false" />
    <add key="ClientValidationEnabled" value="true" />
    <add key="UnobtrusiveJavaScriptEnabled" value="true" />
    <add key="MyKey" value="MyReleaseValue" />
  </appSettings>
  <system.web>
    <compilation targetFramework="4.8.1" />
    <customErrors mode="RemoteOnly" />
    <httpRuntime targetFramework="4.8.1" enableVersionHeader="false" />
    <httpCookies requireSSL="true" />
  </system.web>
  <runtime>
  <!--後面的沒異動,這邊範例省略-->
</configuration>非 Web 專案發佈
非 Web 專案預設並無支援「App.config」Transform,所以需要安裝其他套件處理。
套件
- Visual Studio:在延伸模組安裝「SlowCheetah」。
- NuGet:在要使用 Config Transform 的專案上安裝「Microsoft.VisualStudio.SlowCheetah」。
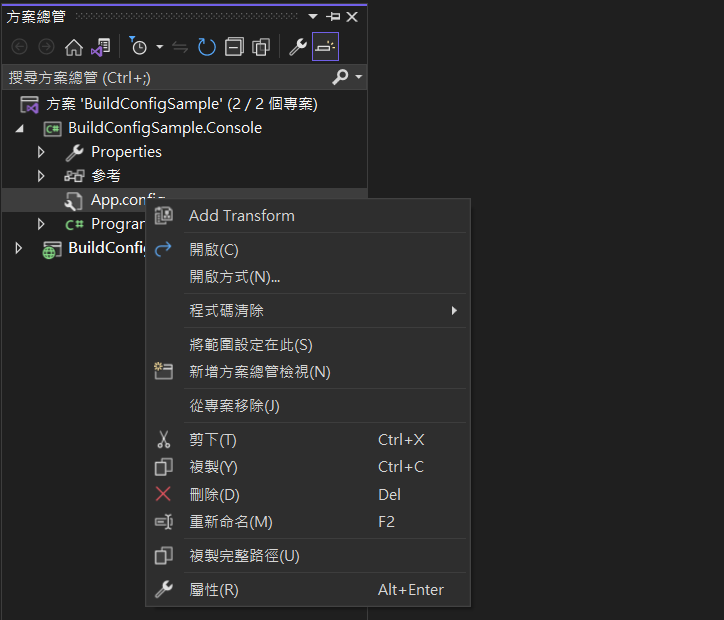
當 Visual Studio 安裝「SlowCheetah」以後,非 Web 專案的 App.config 右鍵選單會增加一個 「Add Transform」的選項,選擇可以產生其他組態的 Config。
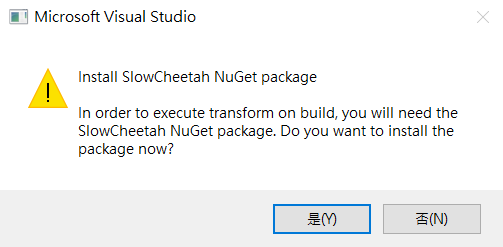
如果 NuGet 未安裝「Microsoft.VisualStudio.SlowCheetah」,會提醒並自動安裝。
TIP
其實 Visual Studio 還有另外一個擴充套件 「ConfigTransformation」可支援 Config Transform,且不需要在專案上額外安裝 NuGet 套件,但 Visual Studio 2022 並不支援此擴充套件,且只能針對完整 Config 結構(根節點為 <configuration />)的 XML 進行轉換。
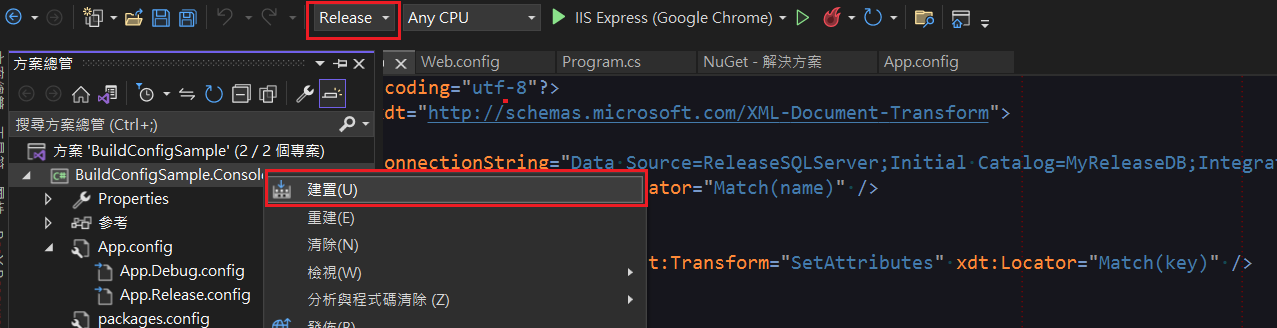
建置
「.NET Framework」的非 Web 專案的發佈是使用 ClickOnce,無法像 Web一樣用一般的發佈到資料夾,但是它的建置會觸發 Config Transform,所以選擇要發佈的組態設定後,建置專案即可,建議建置專案前,先刪除「bin」資料夾。
範例
原本的 App.config
<?xml version="1.0" encoding="utf-8" ?>
<configuration>
  <connectionStrings>
    <add name="MyDB" connectionString="Data Source=SQLServer;Initial Catalog=MyDB;Integrated Security=True" />
  </connectionStrings>
  <appSettings>
    <add key="MyKey" value="MyValue" />
  </appSettings>
  <startup>
    <supportedRuntime version="v4.0" sku=".NETFramework,Version=v4.8.1" />
  </startup>
</configuration>App.Release.config
<?xml version="1.0" encoding="utf-8"?>
<configuration xmlns:xdt="http://schemas.microsoft.com/XML-Document-Transform">
  <connectionStrings>
    <add name="MyDB" connectionString="Data Source=ReleaseSQLServer;Initial Catalog=MyReleaseDB;Integrated Security=True"
         xdt:Transform="SetAttributes" xdt:Locator="Match(name)" />
  </connectionStrings>
  <appSettings>
    <add key="MyKey" value="MyReleaseValue" xdt:Transform="SetAttributes" xdt:Locator="Match(key)" />
  </appSettings>
</configuration>建置後的 {專案名稱}.exe.config
<?xml version="1.0" encoding="utf-8"?>
<configuration>
  <connectionStrings>
    <add name="MyDB" connectionString="Data Source=ReleaseSQLServer;Initial Catalog=MyReleaseDB;Integrated Security=True" />
  </connectionStrings>
  <appSettings>
    <add key="MyKey" value="MyReleaseValue" />
  </appSettings>
  <startup>
    <supportedRuntime version="v4.0" sku=".NETFramework,Version=v4.8.1" />
  </startup>
</configuration>不同專案共用設定檔
如果整個方案底下有多個專案需要連同一個資料庫,例如有網站、多個排程程式或 Web API 等,而每當更換資料庫環境時,就需要全部的專案都進行修改,此時可以考慮將 <connectionStrings /> 單獨放置一個檔案,來讓多個專案進行引用。
設定步驟
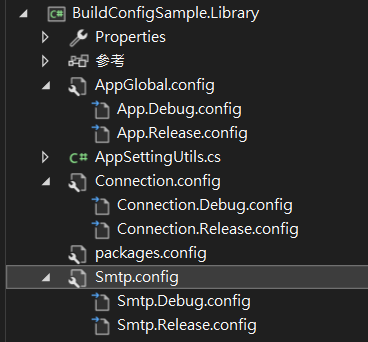
以下建立一個 Library 專案,並新增「AppGlobal.config」、「Connection.config」和「Smtp.config」三個設定檔,三個設定檔都設定 Config Transform。
為了方便,後續會將這三個設定檔統稱為外部設定檔,Config Transform 產出的稱為外部組態設定檔。
設定 Config 內容
這邊以僅以 AppGlobal.config 為例。
AppGlobal.config
<?xml version="1.0" encoding="utf-8" ?>
<appSettings>
  <add key="Test" value="TestValue1" />
</appSettings><?xml version="1.0" encoding="utf-8" ?>
<!--根節點必須包含屬性 xmlns:xdt="http://schemas.microsoft.com/XML-Document-Transform" -->
<appSettings xmlns:xdt="http://schemas.microsoft.com/XML-Document-Transform">
<add key="Test" value="TestReleaseValue1" xdt:Transform="SetAttributes" xdt:Locator="Match(key)" />
</appSettings>從 Web 專案加入引用
- 安裝「Microsoft.VisualStudio.SlowCheetah」來處理這些外部設定檔的轉換。
- Web 專案除了加入 Library 的專案參考。
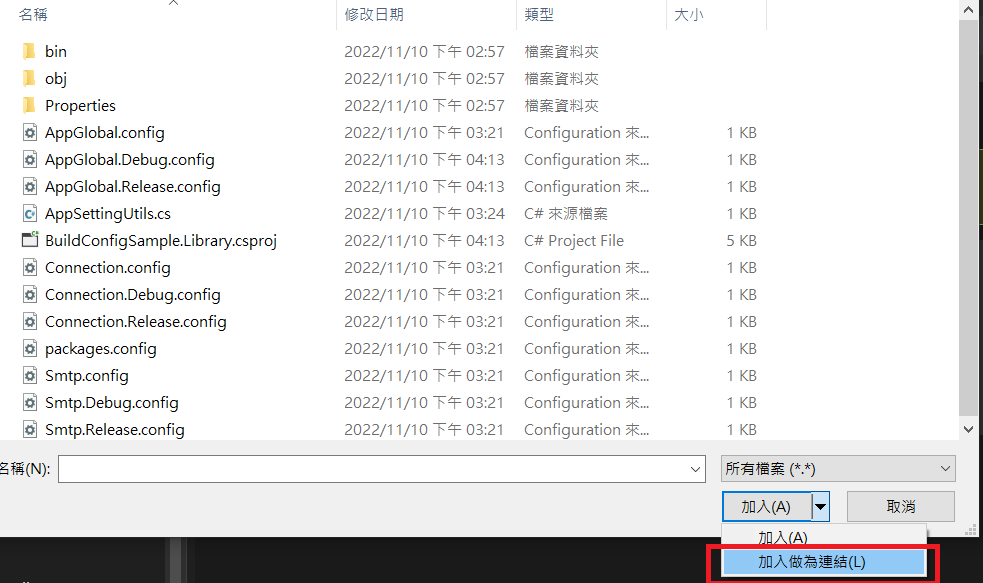
- 還需加入新建的三個 Config 及相關組態檔的檔案連結。 Web 專案選擇加入現有專案。
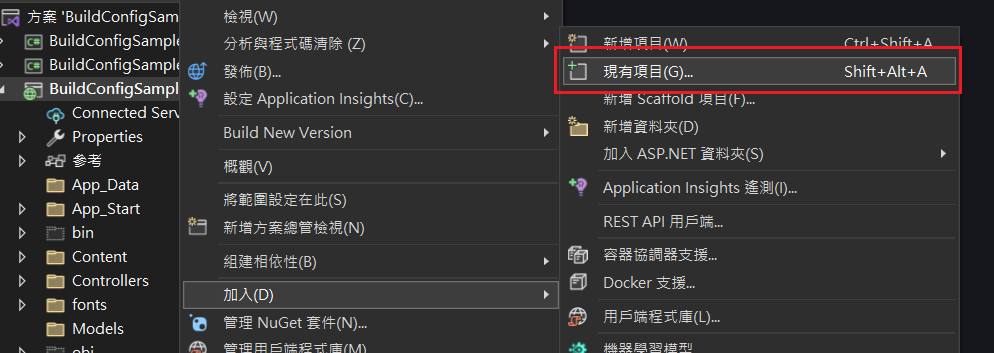
使用加入連結的方式來新增外部設定檔及相關的外部組態設定檔。
- 開啟專案檔(csproj)進行以下修改:
- 增加
<TransformOnBuild>true</TransformOnBuild>,標註要建置時要執行 Config Transform。 - 外部設定檔增加
<CopyToOutputDirectory>Always</CopyToOutputDirectory>。 - 將外部組態設定檔改從
<Content />節點改為<None />節點,避免發佈時,也同時被發佈出去。 - 外部組態設定檔增加
<DependentUpon />節點,使之在 Visual Studio 上面是巢狀顯示在外部設定檔下方。
- 增加
<Content Include="..\BuildConfigSample.Library\AppGlobal.config">
  <Link>AppGlobal.config</Link>
  <TransformOnBuild>true</TransformOnBuild>
  <CopyToOutputDirectory>Always</CopyToOutputDirectory>
</Content>
<None Include="..\BuildConfigSample.Library\AppGlobal.Debug.config">
  <Link>AppGlobal.Debug.config</Link>
  <DependentUpon>AppGlobal.config</DependentUpon>
  <TransformOnBuild>true</TransformOnBuild>
</None>
<None Include="..\BuildConfigSample.Library\AppGlobal.Release.config">
  <Link>AppGlobal.Release.config</Link>
  <DependentUpon>AppGlobal.config</DependentUpon>
  <TransformOnBuild>true</TransformOnBuild>
</None>
<!--Connection.config、Smtp.config 改法一樣-->- 修改「Web.config」和「Web.Release.config」來外部引用外部設定檔。
configSource和file屬性的差別是後者允許增加其他設定做合併。<connectionStrings />和<smtp />皆不可使用file。<appSettings />允許使用configSource,但建議使用file。<appSettings />如果外部引用設定檔的key,與自己增加的key相同,會使用外部引用的值,所以無法藉由定義相同的key來覆蓋設定。- 使用連結的方式加入設定檔,實際上專案根目錄不會有檔案,導致 Web 在執行 Debug 模式時,「Web.config」會無法在同層資料夾找到外部設定檔,所以改引用「bin」底下的檔案(前面在設定時,有將外部設定檔設定「複製到輸出目錄」)。
Web.config
xml<configuration> <connectionStrings configSource="bin\Connection.config" /> <appSettings file="bin\AppGlobal.config"> <add key="webpages:Version" value="3.0.0.0" /> <add key="webpages:Enabled" value="false" /> <add key="ClientValidationEnabled" value="true" /> <add key="UnobtrusiveJavaScriptEnabled" value="true" /> <add key="MyKey" value="MyValue" /> </appSettings> <system.net> <mailSettings> <smtp configSource="bin\Smtp.config" /> </mailSettings> </system.net> <!--後續內容省略--> </configuration>Web.Release.config
xml<configuration xmlns:xdt="http://schemas.microsoft.com/XML-Document-Transform"> <connectionStrings configSource="Connection.config" xdt:Transform="SetAttributes" /> <appSettings file="AppGlobal.config" xdt:Transform="SetAttributes"> <add key="MyKey" value="MyReleaseValue" xdt:Transform="SetAttributes" xdt:Locator="Match(key)" /> </appSettings> <system.net> <mailSettings> <smtp configSource="Smtp.config" xdt:Transform="Replace" /> </mailSettings> </system.net> <!--後續內容省略--> </configuration>
從非 Web 專案加入引用
前面操作步驟都和 Web 一樣,但修改專案檔和 App.config 的內容稍微有點不同。
專案檔裡的外部設定檔是使用 <None /> 節點。
<None Include="..\BuildConfigSample.Library\AppGlobal.config">
  <Link>AppGlobal.config</Link>
  <TransformOnBuild>true</TransformOnBuild>
  <CopyToOutputDirectory>Always</CopyToOutputDirectory>
</None>
<None Include="..\BuildConfigSample.Library\AppGlobal.Debug.config">
  <Link>AppGlobal.Debug.config</Link>
  <DependentUpon>AppGlobal.config</DependentUpon>
  <TransformOnBuild>true</TransformOnBuild>
</None>
<None Include="..\BuildConfigSample.Library\AppGlobal.Release.config">
  <Link>AppGlobal.Release.config</Link>
  <DependentUpon>AppGlobal.config</DependentUpon>
  <TransformOnBuild>true</TransformOnBuild>
</None>TIP
<None /> 節點和 <Content />,分別對應建置行為的「None(無)」和「Content(內容)」,其中「Content(內容)」是給 Web 使用的,詳情請參閱「建置動作值」。
App.config
由於 Debug 模式,設定檔本身就是使用「bin{組態名稱}」底下的 「{專案名稱}.exe.config」檔案,所以路徑不需要指定到「bin」底下。
<?xml version="1.0" encoding="utf-8" ?>
<configuration>
  <connectionStrings configSource="Connection.config" />
  <appSettings file="AppGlobal.config">
    <add key="MyKey" value="MyValue" />
  </appSettings>
  <system.net>
    <mailSettings>
      <smtp configSource="Smtp.config" />
    </mailSettings>
  </system.net>
  <startup>
    <supportedRuntime version="v4.0" sku=".NETFramework,Version=v4.8.1" />
  </startup>
</configuration>App.Release.config
改成外部引用後 App.Release.config 就不需要轉換 connectionStrings 內容。
<?xml version="1.0" encoding="utf-8"?>
<configuration xmlns:xdt="http://schemas.microsoft.com/XML-Document-Transform">
  <appSettings>
    <add key="MyKey" value="MyReleaseValue" xdt:Transform="SetAttributes" xdt:Locator="Match(key)" />
  </appSettings>
</configuration>WARNING
如果使用 Entity Framework 的 Database First,則該專案的 App.config 的連線字串不能使用外部引用檔的方式設定,否則 Entity Framework 的 UI 會找不到已經設定好的連線字串。
切斷 Web.config 的繼承關係
IIS 允許在網站底下建置子網站,此時子網站的 Web.config 會繼承父網站的設定,有時候會發生衝突,特別是在兩邊的 Framework 版本有差異的情況下,此時可以在父網站使用 <location> 來切斷繼承,寫法如下:
<location path="." inheritInChildApplications="false">
  <system.web>
    <!--...內部程式碼...-->
  </system.web>
</location>TIP
理論上<location /> 寫在 <system.web /> 外就夠了,但如果有需要,也可以加在其他節點外,但如果專案有使用 Entity Framework 的 Database First,那千萬不要寫在 <connectionStrings /> 外層,否則會造成 Entity Framework 的 UI 無法讀到已設定的連線字串(又是這個問題 orz)。
相關連結
異動歷程
- 2022-11-10 初版文件建立。