Setting up GitLab as a NuGet Package Source in Visual Studio
I have previously written about how to develop your own packages and publish them to a NuGet Server; for details, please refer to Publishing NuGet packages with default files using Visual Studio. If you want to learn about version control, you can refer to Automating .NET library version management using MinVer.
However, when developing public packages for internal company use, it is not suitable to publish them to a public NuGet Server.
Using GitLab Packages as a Package Repository
If you are already using GitLab as your version control system, you can utilize its Packages repository as a package source. I usually recommend creating a dedicated GitLab group and placing projects intended as packages under this group, allowing projects to use that group as a Packages repository.
Unlike NuGet Server, GitLab does not provide a UI interface for directly uploading nupkg files. However, since we are using GitLab, we can fully leverage GitLab CI/CD to implement an automated publishing process.
Setting up GitLab CI/CD for Automated Publishing
YAML Configuration File
Since I am not very familiar with command-line operations, the following version was generated with the help of Claude. To build a more complete process, it is recommended to add build and test steps: execute build and test when a commit occurs, and execute pack and publish when a tag is used as a version number.
image: 'mcr.microsoft.com/dotnet/sdk:8.0'

stages:
 - pack     # Stage 1: Pack the project into a NuGet package
 - publish  # Stage 2: Publish the package to the GitLab package repository

variables:
 NUGET_PACKAGES_DIRECTORY: '.nuget'  # Set the output directory for NuGet packages

before_script:
 # Display project structure information
 - echo "Repository structure:"
 # Find all .csproj files and display them sorted
 - find . -type f -name "*.csproj" | sort
 # Find the first .csproj file and store it in a variable
 - export PROJECT_FILE=$(find . -type f -name "*.csproj" | head -n 1)
 # Get the directory path where the project file is located
 - export PROJECT_DIR=$(dirname "$PROJECT_FILE")
 # Get the project name (excluding the .csproj extension)
 - export PROJECT_NAME=$(basename "$PROJECT_FILE" .csproj)
 # Display the found project information
 - echo "Found project:$PROJECT_NAME at $PROJECT_DIR"
 # Add the GitLab group's NuGet package repository as a source
 # Note: The name parameter set here must be different from the project-level repository name to avoid conflicts
 # This package source will be used for dotnet restore and dotnet pack commands to ensure dependencies can be resolved
 - dotnet nuget add source "${CI_API_V4_URL}/groups/${PACKAGES_GROUP_ID}/-/packages/nuget/index.json" --name gitlab-packages --username gitlab-ci-token --password ${CI_JOB_TOKEN} --store-password-in-clear-text

pack:
 stage: pack
 tags:
   - docker
 script:
   # Display the project being packed
   - echo "Packing project:$PROJECT_DIR"
   # Pack the project in Release mode and output to the specified directory
   - dotnet pack $PROJECT_DIR --configuration Release --output $NUGET_PACKAGES_DIRECTORY
 artifacts:
   paths:
     # Save the generated .nupkg file as an artifact for use in subsequent stages
     - $NUGET_PACKAGES_DIRECTORY/*.nupkg

publish:
 stage: publish
 tags:
   - docker
 script:
   # Display the project being published
   - echo "Publishing package for project:$PROJECT_NAME"
   # Permissions from the parent group are automatically inherited by this project level, so add the current project's GitLab NuGet package repository as a source directly
   # The --store-password-in-clear-text parameter tells NuGet to store the password in plain text in the NuGet configuration file instead of encrypting it, avoiding issues in CI/CD environments lacking corresponding encryption components
   - dotnet nuget add source "${CI_SERVER_URL}/api/v4/projects/${CI_PROJECT_ID}/packages/nuget/index.json" --name gitlab-project --username gitlab-ci-token --password ${CI_JOB_TOKEN} --store-password-in-clear-text
   # Switch to the NuGet package directory
   - cd $NUGET_PACKAGES_DIRECTORY
   # Publish the NuGet package generated in the pack stage (although it loops through all .nupkg files, there is actually only one package because only the first found project was packed)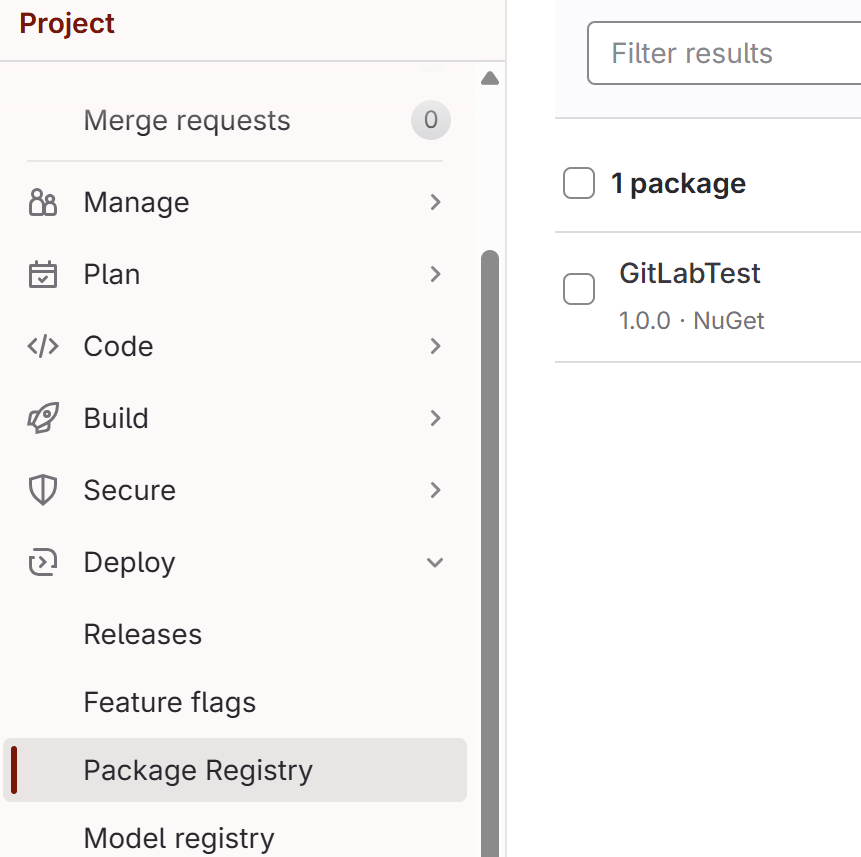
- for pkg in *.nupkg; do dotnet nuget push "$pkg" --source gitlab-project; doneAfter the pipeline finishes, you can see the package in the "Deploy" → "Package Registry" section of the group or project, as shown in the image below:
Configuring Job Token Permissions
In the YAML file, you can see that $CI_JOB_TOKEN is used to access GitLab Packages. However, this temporary token generated by CI/CD is restricted by default to accessing the project's own packages within the CI/CD process. To access packages from other projects or groups, you need to extend the scope of the $CI_JOB_TOKEN permissions.
Steps to extend token permissions:
Go to "Settings" → "CI/CD".
In the "Job token permissions" section, click "Add group or project".
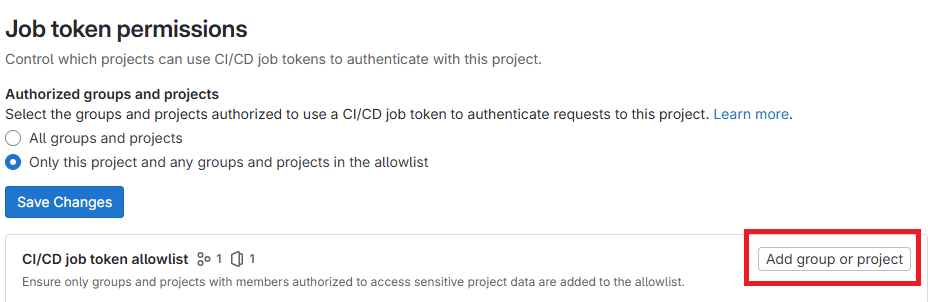
Add the required groups or projects to allow them to access the current project's packages.
TIP
Before additional configuration, I tried using $CI_JOB_TOKEN and Group Access Token; dotnet nuget add source worked fine, but dotnet restore failed to retrieve the corresponding package list. After adding the --verbosity detailed parameter, it showed the error message "error NU1101: Unable to find package {Your Packages}. No packages exist with this id in source(s):". It only worked after I adjusted the Job Token permissions for the dependency package project.
Setting up GitLab Package Source in Visual Studio
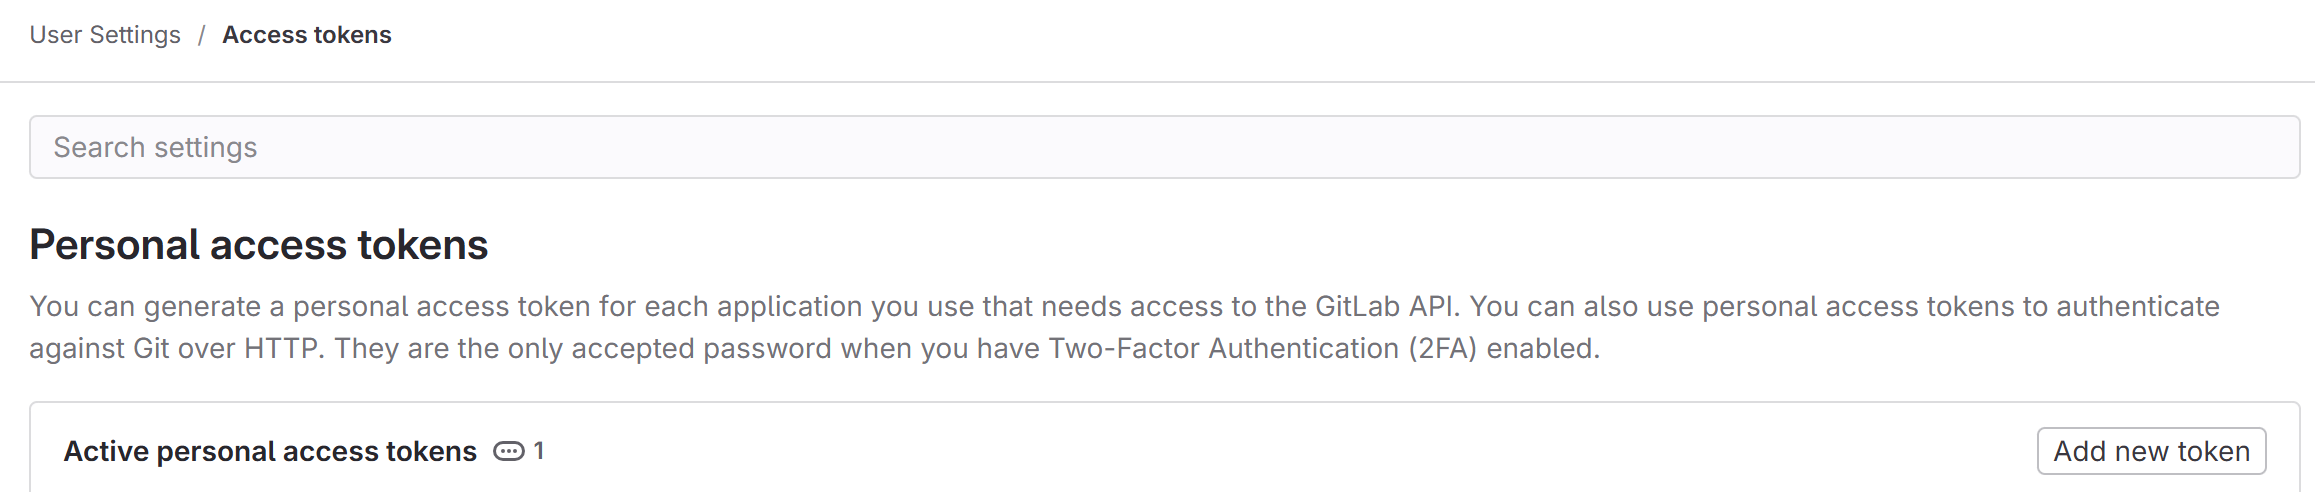
Creating an Access Token
First, you need to create a token for Visual Studio to access.
Steps to create a token in GitLab:
- Click on your profile avatar.
- Select "Preferences".
- Click on "Access Tokens".
- Click "Add new token".
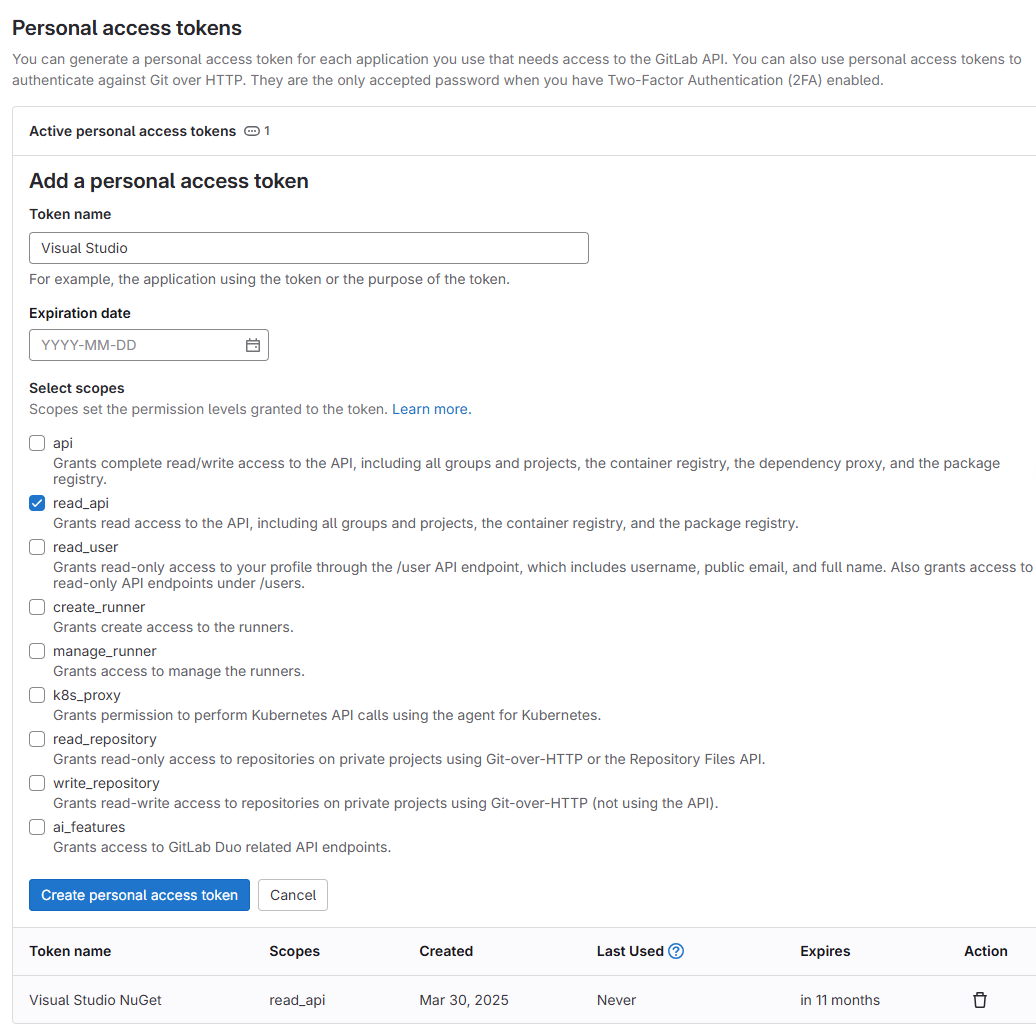
You need to complete the following three parts on the token settings page:
- Set an easily identifiable name; you can name it according to your preference.
- If necessary, set an "Expiration date"; if there is no time limit, you can leave it blank.
- Check the API permission. Since the publishing work is done via CI/CD, Visual Studio only needs to read packages, so you only need to check the
read_apipermission.
After configuration, click the "Create personal access token" button to generate the token.
Please note that the token will only be displayed once on this page; please click the copy button immediately and save it securely.

Adding Package Source in Visual Studio
Next, configure the package source in Visual Studio:
- Click "Tools".
- Select "Options".
- Go to "NuGet Package Manager".
- Click "Package Sources".
- Add
https://{GitLab Domain}/api/v4/groups/{Group ID}/-/packages/nuget/index.json.
In this example, I named the new package source "GitLabTest", so I select "GitLabTest" in the list.

The system will pop up a window asking for your username and password. Since I have entered them before, there is no screenshot here.
Please enter your GitLab username in the account field and the token you just generated in the password field.
After completing the above settings, you will be able to see the published packages.

If the NuGet credential input window pops up again after restarting Visual Studio, please follow these steps to check the configuration:
- Open the
%AppData%\NuGet\NuGet.Configconfiguration file. - Verify if the
<packageSourceCredentials>block is included in the file.
If the credential configuration is missing, open the command prompt and execute:
dotnet nuget add source "https://{GitLab Domain}/api/v4/groups/{Group ID}/-/packages/nuget/index.json" --name=GitLab --username={GitLab Username} --password={Access Token}Change Log
- 2025-03-30 Initial document created.