在 ASP.NET 使用 Redis 實作分散式快取
如何在 Windows 上安裝 Redis
Redis 是 In-Memory 的 NoSQL 資料庫,最初是在 Linux 上發展起來,後續也並無移植 Windows 上面,所以目前在官方網站並無 Windows 版本的安裝檔,如果要在 Windows 上使用,目前有以下方法:
從微軟提供的安裝檔進行安裝: 微軟有在 GitHub 上嘗試建置 Windows 版的 Redis,可在這邊進行下載。但不建議使用這個版本,原因如下:
- 此 Repository 已被註明唯讀封存,最後一次維護時間是在 2016/7/1,Redis 版本為 3.2 版,但現今 Redis 已到 7 版(6.2以前的版本異動請參閱主要版本和相容性差異),相較之下 GitHub 上版本過舊,且在 issue 發問不會有人協助解答。
- 3.0.5 有嚴重 bug, 發佈在 NuGet 上的 Redis-64 也被標註「Deprecation」。
- 3.2.1 的發佈紀錄上有提到雖然有經過所有標準測試,但尚未在生產環境中進行測試,原本是發佈,後續也改成預發佈(從此 Blog 上的安裝說明可以看到,當時的 3.2.1 是被標註 Lasted-release,而非現在的 Pre-release),代表微軟後續也並未將它認為是一個成熟的版本。
雖然還是有其他人嘗試在做移植行為,如此 Repository 「tporadowski/redis」,有嘗試將 Redis 5移植到 Windows,但穩定性來說可能會需要再測試。
Memurai: Memurai 是一個兼容 Redis 5 的 Redis 分支,目前已有實作到 6.2 的功能,不過 Developer Edition 僅支援開發和測試環境,不支援生產。
WSL 2: 官網目前在 Windows 環境上的建議是使用 WSL2 安裝,詳情安裝方式可參閱「在 Windows 上安裝 Redis」。
Docker: 安裝的方式,請參考官網 Redis 、 Docker Hub redis 和 Docker Hub redislabs/redis。 這邊可以發現有 Docker 上有兩個官方的 Redis Image,其中 「redis」 為 Docker 廠商在維護的版本,「redislabs/redis」 則為 Redis 廠商在維護的版本,目前 「redislabs/redis」 有標註僅支援開發和測試環境,不支援生產。
使用 Memurai 安裝
目前僅支援 Windows 10 和 Windows Server 2012 以上(建議 2016 以上)的 64 位元版本。
安裝步驟如下:
- 至官網下載連結,這邊點擊 Developer Edition 的 「Download」。
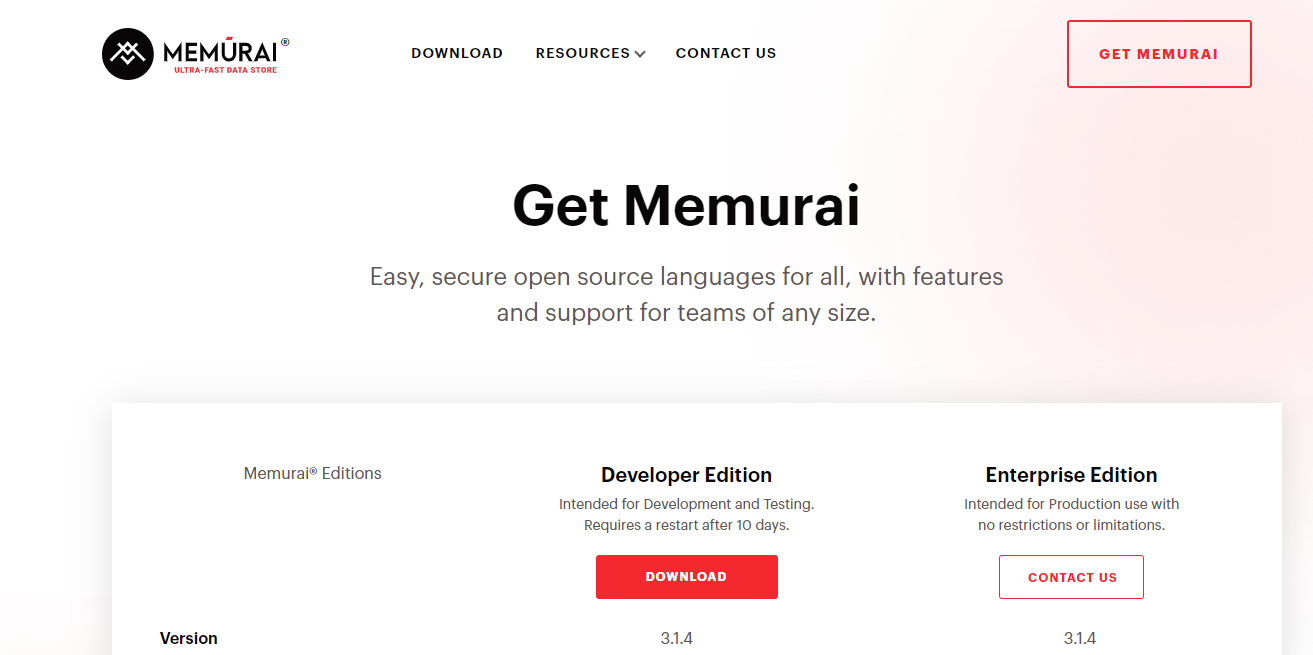
- 需填寫資料才能下載。
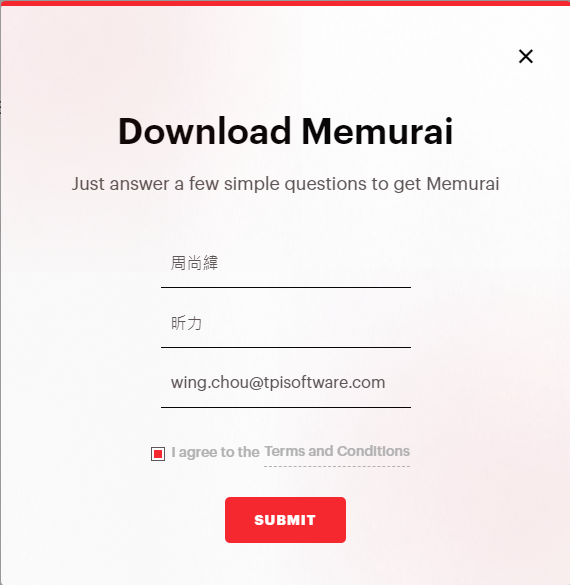
點擊下載下來的安裝檔「Memurai-Developer-v{Version}.msi」,開始點下一步安裝。
安裝時,有個步驟需要注意下,這邊會設定 Port 和加入防火牆例外,需注意 Port 是否已被使用。
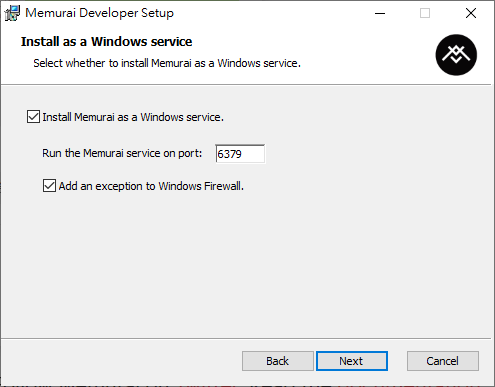
一些額外的安裝設定可參閱 官網安裝教學。
TIP
由於 Memurai 本身是兼容 Redis 的分支,連線 Redis 的工具,可以直接連結 Memurai 的資料庫,像是 Visual Studio 可以使用原本連線 Redis 套件,在不變更程式碼的情況下,連線Memurai 的資料庫。
使用 Docker 安裝
這邊使用 Docker 提供的 Redis Image 來安裝
Redis 在沒有設定檔「redis.conf」的情況下,會使用預設設定,如果有需要對設定進行調整,由於 Image 並沒有包含「redis.conf」,所以需要至官網 Redis configuration 下載要安裝版本的 config 檔案。
「docker-compose.yml」裡 Volumns 的本機位置請依自身需求調整,將「redis.conf」放在 Config 資料夾底下,使用 command 關鍵詞執行 Redis 指令來更新 Config 設定,內容大致如下:
textversion: '3.8' services: Redis-Server: image: redis:7 container_name: Redis-Server ports: - 6379:6379 volumes: - .\Volumes\Data:/data - .\Volumes\Config:/usr/local/etc/redis command: redis-server /usr/local/etc/redis/redis.conf restart: always開啟 Command Line,使用指令
cd切換到「docker-compose.yml」所在目錄,執行指令docker-compose up -d。
TIP
- 當 Container Run 起來時,可能會發現資料夾「/data」底下並無任何檔案,這是正常現象,當連線 Redis 寫入資料或是把 Container 關掉時,會發現底下多出一個「dump.rdb」。
- 當如果外部連結 Redis 無法正常,本機環境可參考 Could not connect to Redis at 127.0.0.1:6379: Connection refused in docker裡的內容修改「redis.conf」的以下內容:
- 將
bind 127.0.0.1 -::1註解掉。 - 將
protected-mode yes改為protected-mode no。
- 將
bind參數是設定允許連接的網路 IP,可以設定多組 IP,如果只設定bind 127.0.0.1 -::1變成只有本機環境可以連結。protected-mode參數如果設定為yes,則需要有設定bind參數或密碼設定,密碼設定請參閱requirepass參數上方的註解,Redis 6 和舊版設定不太一樣。
- 當如果外部連結 Redis 無法正常,本機環境可參考 Could not connect to Redis at 127.0.0.1:6379: Connection refused in docker裡的內容修改「redis.conf」的以下內容:
在 ASP.NET Core 使用 Cache
程式碼範例
- Framework:Razor Pages
- .NET 版本:.NET 6
- NuGet 套件: Microsoft.Extensions.Caching.Abstractions 6.0.0
Program.cs
builder.Services.AddMemoryCache();IndexModel.cshtml.cs
public class IndexModel : PageModel {
    private readonly IMemoryCache memoryCache;
    private const string CacheKey = "CacheKey";

    public IndexModel(IMemoryCache memoryCache) {
        this.memoryCache = memoryCache;
    }

    public DateTime CurrentDateTime { get; set; }

    public DateTime CacheCurrentDateTime { get; set; }

    public void OnGet() {
        CurrentDateTime = DateTime.Now;

        // 如果沒有快取資料,則更新快取時間
        if (!memoryCache.TryGetValue(CacheKey, out DateTime cacheValue)) {
            cacheValue = CurrentDateTime;

            MemoryCacheEntryOptions cacheEntryOptions = new MemoryCacheEntryOptions()
                .SetAbsoluteExpiration(TimeSpan.FromMinutes(1)); // 設定快取 1 分鐘後過期

            _ = memoryCache.Set(CacheKey, cacheValue, cacheEntryOptions);
        }

        CacheCurrentDateTime = cacheValue;
    }
}IndexModel.cshtml
@page
@model IndexModel

<ul>
    <li>目前時間: @Model.CurrentDateTime</li>
    <li>快取時間: @Model.CacheCurrentDateTime</li>
</ul>執行結果
第一次瀏覽,目前時間和快取時間一樣

第二次瀏覽,目前時間更新,快取時間沒更新

隔一分鐘後第三次瀏覽,目前時間和快取時間都更新為現在時間

Absolute 和 Sliding
微軟的 MemoryCache 提供兩個快取到期的時間策略,比較如下:
- Absolute:絕對到期時間,只要時間到就刪除快取資料。
- Sliding:設定多久沒被讀取資料,就清除快取資料,如果一直有被讀取,會導致快取資料一直存在,所以當快取的資料是有異動可能時,最好搭配 Absolute 或
IChangeToken(.NET Framework 是ChangeMonitor),來讓快取資料過期。
MSDN 範例
在 ASP.NET Core 使用 Redis 實作分散式快取
程式碼範例
調整上一個範例的套件和程式碼。
- NuGet 套件:Microsoft.Extensions.Caching.StackExchangeRedis 6.0.10
Program.cs
builder.Services.AddStackExchangeRedisCache(options => {
    // Redis 請換成 appsettings.json 裡的設定
    options.Configuration = builder.Configuration.GetConnectionString("Redis");
    options.InstanceName = "SampleInstance";
});TIP
GetConnectionString("Redis"),請在 appsettings.json 設定 Redis 的連線字串。
IndexModel.cshtml.cs
public class IndexModel : PageModel {
    private readonly IDistributedCache cache;
    private const string CacheKey = "CacheKey";

    public IndexModel(IDistributedCache cache) {
        this.cache = cache;
    }

    public string? CurrentDateTime { get; set; }

    public string? CacheCurrentDateTime { get; set; }

    public async Task OnGetAsync() {
        CurrentDateTime = DateTime.Now.ToString();

        string cachedValue = await cache.GetStringAsync(CacheKey);
        if (cachedValue is null) {
            DistributedCacheEntryOptions options = new() {
                AbsoluteExpirationRelativeToNow = TimeSpan.FromMinutes(1)
            };

            cachedValue = CurrentDateTime;
            await cache.SetStringAsync(CacheKey, cachedValue, options);
        }

        CacheCurrentDateTime = cachedValue;
    }
}WARNING
如果在 App Server 只有一台,並無使用分散式架構的情況下,其實不需要使用 Redis 來作分散式快取,而是只用原來的 MemoryCache 就足夠了。 一來是 App Server 直接讀取本機記憶體的資料效能一定優於透過遠端主機讀取快取資料。 二來是 IDistributedCache 提供的原生 API 介面較沒 IMemoryCache 豐富,IMemoryCache 有提供擴充方法來存取不同型別的資料,但 IDistributedCache 本身的擴充方法只支援 string 的使用,所以在 IDistributedCache 會建議配合專案需求自行擴增 API,使用上或許會較為方便。
MSDN 文件
在 ASP.NET Framework 使用 Redis 實作分散式快取
程式碼範例
- Framework:MVC
- .NET 版本:4.8.1
- NuGet 套件:StackExchange.Redis 2.6.70
RedisConnection.cs
public sealed class RedisConnection {
    private static readonly Lazy<RedisConnection> lazy = new Lazy<RedisConnection>(() => new RedisConnection());

    private RedisConnection() {
        ConnectionMultiplexer = ConnectionMultiplexer.Connect("127.0.0.1:6379");
    }

    public static RedisConnection Instance => lazy.Value;

    public ConnectionMultiplexer ConnectionMultiplexer { get; }
}HomeController
public class HomeController : Controller {
    private const string CacheKey = "CacheKey";

    public async Task<ActionResult> Index() {
        IDatabase db = RedisConnection.Instance.ConnectionMultiplexer.GetDatabase(0);
        ViewBag.CurrentDateTime = DateTime.Now.ToString();

        string encodedCachedValue = await db.StringGetAsync(CacheKey);
        if (encodedCachedValue != null) {
            ViewBag.CacheCurrentDateTime = encodedCachedValue;
        } else {
            encodedCachedValue = ViewBag.CurrentDateTime;
            _ = await db.StringSetAsync(CacheKey, encodedCachedValue, TimeSpan.FromMinutes(1));
                ViewBag.CacheCurrentDateTime = ViewBag.CurrentDateTime;
        }
        return View();
    }
}Index.cshtml
@{
    ViewBag.Title = "Home Page";
}

<ul>
    <li>目前時間: @ViewBag.CurrentDateTime</li>
    <li>快取時間: @ViewBag.CacheCurrentDateTime</li>
</ul>參考資料
異動歷程
- 2022-11-02 初版文件建立。